Livestream Clients#
This section shows you the methods of livestreaming a headless instance of Isaac Sim.
Warning
Isaac Sim livestreaming (both the native desktop client and the web-based viewer) is designed for use on private or trusted networks. The streaming endpoints do not include authentication or encryption. Do not expose them on the public Internet without additional safeguards such as a reverse proxy with HTTPS/TLS and authentication (e.g. nginx with SSL certificates and basic auth). When deploying on cloud VMs, restrict the streaming ports to your client IP using firewall rules. Users are responsible for securing any public-facing deployments.
Note
Only one method of streaming can be used at a time for each Isaac Sim instance.
Only one client can access an Isaac Sim instance at a time.
To exit the Isaac Sim app remotely: Click the File menu, then click Exit in the streamed Isaac Sim app. Next, close the Isaac Sim WebRTC Streaming Client app.
Livestreaming is not supported when Isaac Sim is run on the A100 GPU. NVENC (NVIDIA Encoder) is required for livestreaming and is not included in the A100 GPU.
See Video Encode and Decode Support Matrix for supported GPU with NVENC.
By downloading or using the NVIDIA Isaac Sim WebRTC Streaming Client, you agree to the NVIDIA Isaac Sim WebRTC Streaming Client License Agreement.
Client platform support and Isaac Sim host platform support are separate. Use the downloads listed in the Latest Release section for supported client packages.
There are two ways to connect to a livestreaming Isaac Sim instance:
Isaac Sim WebRTC Streaming Client — A native desktop application available for Windows, macOS, and Linux. Download it from the Latest Release section. Best suited for local or same-network connections.
Web-based viewer (Docker Compose) — A browser-based client deployed alongside Isaac Sim using Docker Compose. Runs in any Chromium-based browser with no installation required. Recommended for cloud and remote deployments. See Web-Based Streaming Client (Docker Compose) below.
Isaac Sim WebRTC Streaming Client#
Isaac Sim WebRTC Streaming Client is the recommended streaming client to view Isaac Sim remotely on your desktop or workstation without a powerful GPU.
To use the Isaac Sim WebRTC Streaming Client, run Isaac Sim using one of the following methods:
See Workstation Installation for full installation instructions.
cd ~/isaacsim
./isaac-sim.streaming.sh
See Workstation Installation for full installation instructions.
cd C:\isaacsim
isaac-sim.streaming.bat
See Container Installation for full installation instructions.
cd /isaac-sim
./runheadless.sh
Important
The container must be started with --network=host for livestreaming to work.
Docker bridge networking (-p port mapping) does not work with WebRTC because
the host IP is not reachable from inside the container’s network namespace.
For a simpler setup, Docker Compose is recommended for containerized streaming. It handles volume mounts, GPU assignment, networking, and health checks automatically. See Web-Based Streaming Client (Docker Compose) below or the Docker README for details.
See Python Environment Installation for full installation instructions.
isaacsim isaacsim.exp.full.streaming --no-window
See Python Environment for full installation instructions.
./python.sh standalone_examples/api/isaacsim.simulation_app/livestream.py
Note
The machine running Isaac Sim must have an NVIDIA GPU with NVENC support and a compatible NVIDIA driver. On Linux hosts,
nvidia-smiconfirms the GPU and driver version. In containers, confirm the NVIDIA Container Toolkit exposes the encode library withldconfig -p | grep libnvidia-encode.To run Isaac Sim on remote instance to be connected via the Internet, add these flags:
--/exts/omni.kit.livestream.app/primaryStream/publicIp=<PUBLIC_IP> --/exts/omni.kit.livestream.app/primaryStream/signalPort=49100 --/exts/omni.kit.livestream.app/primaryStream/streamPort=47998For an example in a Docker container:
PUBLIC_IP=$(curl -s ifconfig.me) && ./runheadless.sh --/exts/omni.kit.livestream.app/primaryStream/publicIp=$PUBLIC_IP --/exts/omni.kit.livestream.app/primaryStream/signalPort=49100 --/exts/omni.kit.livestream.app/primaryStream/streamPort=47998
Use the same Public IP in the Isaac Sim WebRTC Streaming Client app.
The following ports must be opened on the host running Isaac Sim:
Port
Protocol
Purpose
49100TCP
WebRTC signaling
47998UDP
WebRTC media stream
8210TCP
Web viewer (Docker Compose only)
If the client shows a black screen or the ports are not listening, first confirm the Isaac Sim app reached the loaded state. For containers, confirm the container was started with
--network=host. For cloud or remote hosts, confirm the public IP passed to Isaac Sim is the same IP used by the client. Firewalls must allow both TCP49100and UDP47998; opening only TCP ports is not sufficient for WebRTC media.
Make sure that the Isaac Sim app is loaded and ready. It can take a few minutes for Isaac Sim to be completely loaded the first time.
To confirm this, look for the following message in the terminal/console output or the application logs. This line may not appear when running using PIP or Python Sample.
Isaac Sim Full Streaming App is loaded.
Download Isaac Sim WebRTC Streaming Client from the Latest Release section for your platform.
Run the Isaac Sim WebRTC Streaming Client app.
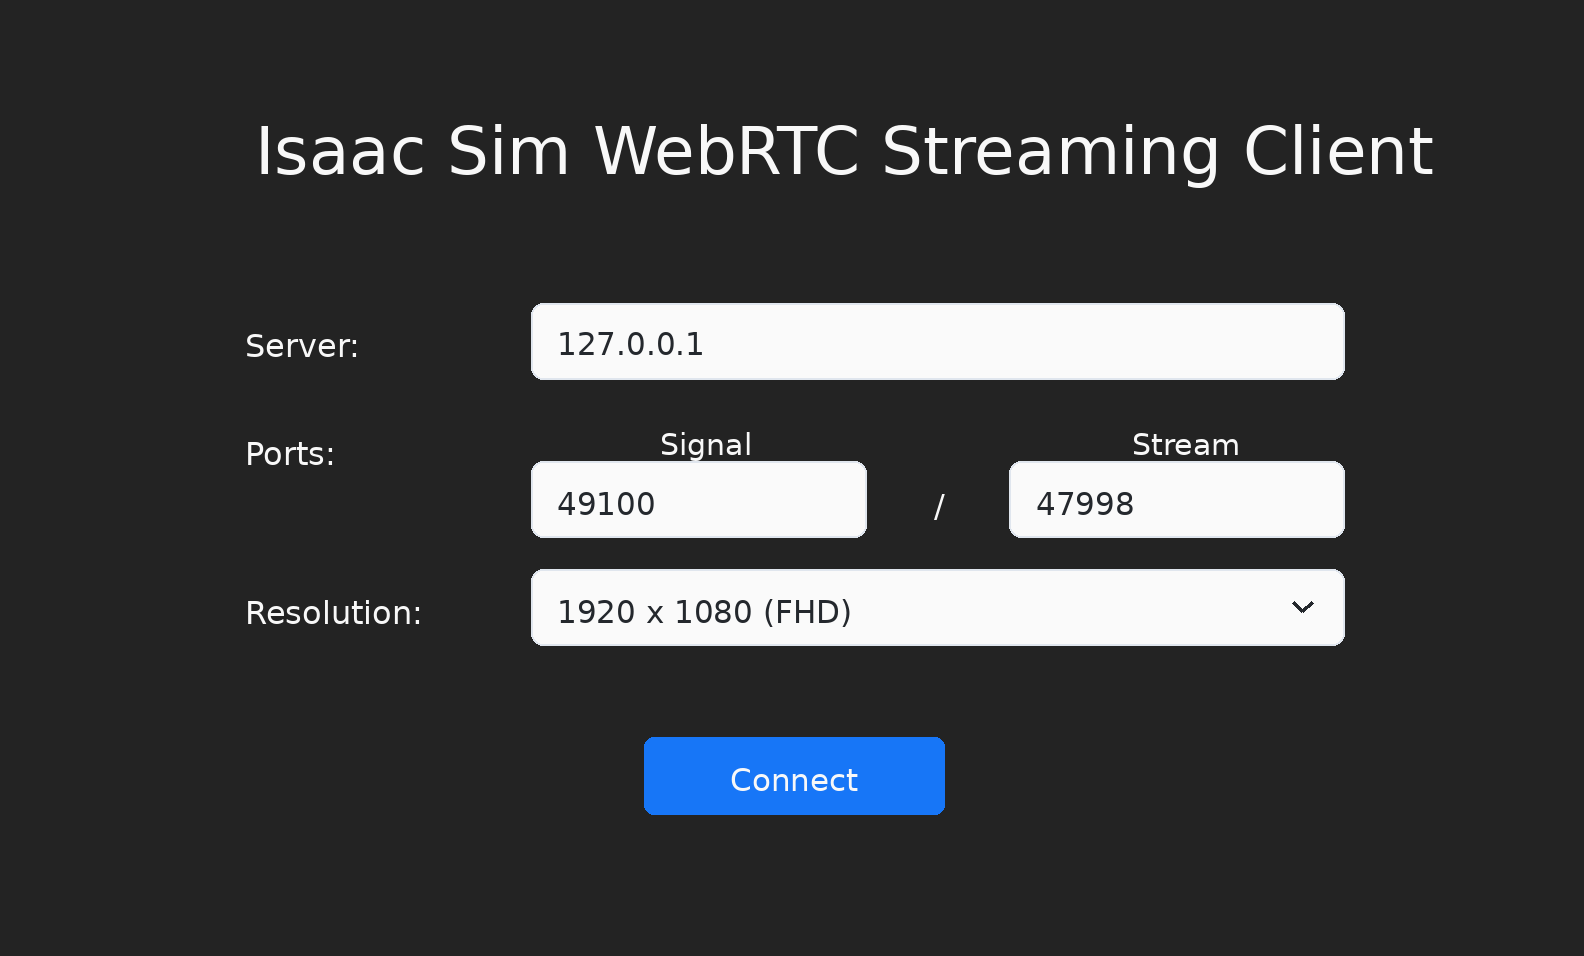
Use the default 127.0.0.1 IP address as the server to connect to a local instance of Isaac Sim.
Click Connect. The connection process may take a few moments. You should see the Isaac Sim interface appear in the client window once connected.
Note
Isaac Sim WebRTC Streaming Client is recommended to be used within the same network as an Isaac Sim headless instance.
To connect to a headless instance of Isaac Sim in the same network, replace 127.0.0.1 with the IP address of the machine running Isaac Sim.
On Linux: install the Debian package.
Debian package (Ubuntu / Debian, with menu integration):
sudo dpkg -i ./isaacsim-webrtc-streaming-client-*-linux-*.deb
sudo apt -f install
dpkg -l | grep isaacsim-webrtc-streaming-client
Then launch Isaac Sim WebRTC Streaming Client from the application menu or run
isaacsim-webrtc-streaming-clientfrom a terminal.No FUSE or AppImage runtime is required by the package; it runs on Ubuntu 22.04, 24.04, and later without additional system libraries beyond a standard desktop environment.
On Ubuntu 24.04 or later, Electron’s sandbox requires unprivileged user namespaces. If the client fails to launch with a SUID sandbox error, enable them with:
sudo sysctl -w kernel.unprivileged_userns_clone=1
sudo sysctl -w kernel.apparmor_restrict_unprivileged_userns=0
The
sysctl -wsettings are temporary and reset after reboot. To make them persistent, add them to a file under/etc/sysctl.d/:sudo tee /etc/sysctl.d/99-electron-sandbox.conf >/dev/null <<'EOF' kernel.unprivileged_userns_clone=1 kernel.apparmor_restrict_unprivileged_userns=0 EOF sudo sysctl --system
On Windows:
If you have issues connecting to a local or remote Isaac Sim instance, make sure the /kit/kit.exe and Isaac Sim WebRTC Streaming Client app is on the allow list in the Windows Firewall.
On Mac:
Open the DMG file then click and drag the Isaac Sim WebRTC Streaming Client app to the Applications folder icon to install.
When streaming Isaac Sim app, use
Ctrl+CandCtrl+Vto copy and paste respectively within the streamed app.To copy from host to client, use
⌘CandCtrl+V.
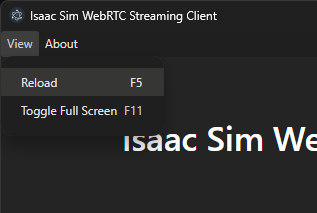
To reload the connection, click Reload in the View menu. This may be useful if you see a blank screen after some time.
Web-Based Streaming Client (Docker Compose)#
As an alternative to the native desktop client, you can stream Isaac Sim to any Chromium-based browser using a web-based WebRTC client deployed alongside Isaac Sim via Docker Compose.
For full details on Docker Compose configuration, multi-instance deployment, and environment variables, see the Docker README.
This method does not require downloading or installing a native application. The web viewer is built from the NVIDIA Omniverse Web SDK (@nvidia/create-ov-web-rtc-app) and connects to Isaac Sim over WebRTC.
Note
Docker Compose web viewer deployment is supported only on Ubuntu hosts and DGX Spark systems. Windows hosts, including WSL, are not supported.
Quick Start:
# Create cache/log mounts (use uid 1234 to match container user)
mkdir -p ~/docker/isaac-sim/{cache/main,cache/computecache,config,data,logs,pkg}
mkdir -p ~/.cache/ov/hub
sudo chown -R 1234:1234 ~/docker ~/.cache/ov/hub

# Build the Isaac Sim image (skip if using a prebuilt NGC image)
./tools/docker/prep_docker_build.sh --build --x86_64
./tools/docker/build_docker.sh --x86_64

# Launch Isaac Sim + web viewer
docker compose -p isim -f tools/docker/docker-compose.yml up --build -d

# Check the web viewer URL
docker compose -p isim logs web-viewer
Note
On DGX Spark, use --aarch64 instead of --x86_64 in the build commands above.
Open the URL shown in the logs (e.g. http://<host-ip>:8210) in a Chromium-based browser.
If Docker Compose reports a Hub startup or connectivity issue after a previous test, restart the Hub container from Hub Workstation Cache and retry Docker Compose.
To use a prebuilt NGC image instead of building locally:
ISAAC_SIM_IMAGE=nvcr.io/nvidia/isaac-sim:6.0.0 docker compose -p isim -f tools/docker/docker-compose.yml up --build -d
Keyboard Shortcuts:
Action |
Windows / Linux |
Mac |
|---|---|---|
Copy / paste |
Ctrl+C / Ctrl+V |
Ctrl+C / Ctrl+V |
Refresh the browser page |
F5 or Ctrl+R |
Fn+F5 or Cmd+R |
Maximize viewport in Isaac Sim |
F7 |
Fn+F7 |
Toggle browser fullscreen |
F11 |
Shift+Fn+F11 |
Open DevTools |
F12 |
Fn+F12 or Cmd+Option+I |
Note
The browser Clipboard API requires a secure context. When accessing the web viewer over HTTP from a non-localhost address, clipboard forwarding to Isaac Sim is blocked. To enable it in Chrome, open
chrome://flags/#unsafely-treat-insecure-origin-as-secure, add the web viewer URL (e.g.http://192.168.1.100:8210), and relaunch Chrome.The web viewer supports multi-instance deployment with dedicated GPUs, custom ports, and more. See the Docker README for full configuration details.