Robot Assembler#
Learning Objectives#
This tutorial shows how to use the isaacsim.robot_setup.assembler extension to assemble two USD assets into a single rigid body. This tutorial will primarily demonstrate the use of the Robot Assembler UI tool. By the end of this tutorial, you will understand the physical mechanics of assembled bodies, when to use the Robot Assembler, and the current limitations with assembling rigid bodies in NVIDIA Isaac Sim.
5-10 Minutes Tutorial
Getting Started#
To find this tutorial of use, you must have two USD assets to assemble into one. This can include:
A robot arm that needs to be attached to a gripper.
A robot that needs to be fixed to a moving base.
The use of the word ‘robot’ here indicates a USD asset that Contains the Robot Schema Applied.
Understanding the Mechanics of Assembled Bodies#
The Robot Assembler tool allows you to combine two USD assets together by a physically simulated fixed joint. The result is a USD asset that can be saved and loaded without needing to use the Robot Assembler each time. The fact that the fixed joint is physically simulated is key in understanding proper application of the Robot Assembler extension. In Omniverse, physics is only simulated while the timeline is playing. When physics is not active, the fixed joint will not have any effect. Only use the Robot Assembler to combine USD assets that are going to be moving while the timeline is playing. For example, a robot that is fixed in place on a static table does not need to have a fixed joint connecting it to the table; you can place both the robot and the table independently of each other and they will stay in place after the timeline is played.
Additionally, because two assembled assets are attached using a physically simulated fixed joint, the position of one asset relative to another is resolved by a physics solver. This solution is easy if the assets are already placed correctly relative to each other while the timeline is stopped, but you might experience instability if, on a stopped timeline, you move one part of an assembled asset far away from the other and start the timeline.
Using the Robot Assembler Tool#
Assembling Robots#
The Robot Assembler UI tool can be found in the NVIDIA Isaac Sim toolbar by under Tools > Robotics > Asset Editors > Robot Assembler.
To use the Robot Assembler, start by loading the assets you want to assemble on the USD stage. There are two editing modes for the Robot Assembler. The workflow is the same for both modes, but the final result will be slightly different:
-Direct Asset editing: Open the robot that will serve as a base of the assembly directly, and add a reference to the components to be assembled. This will configure the attached component as a configuration option in the original asset. -Stage Editing: Add both components to be assembled together as a reference to the stage. This will connect both components together at the current stage and will not modify the original assets.
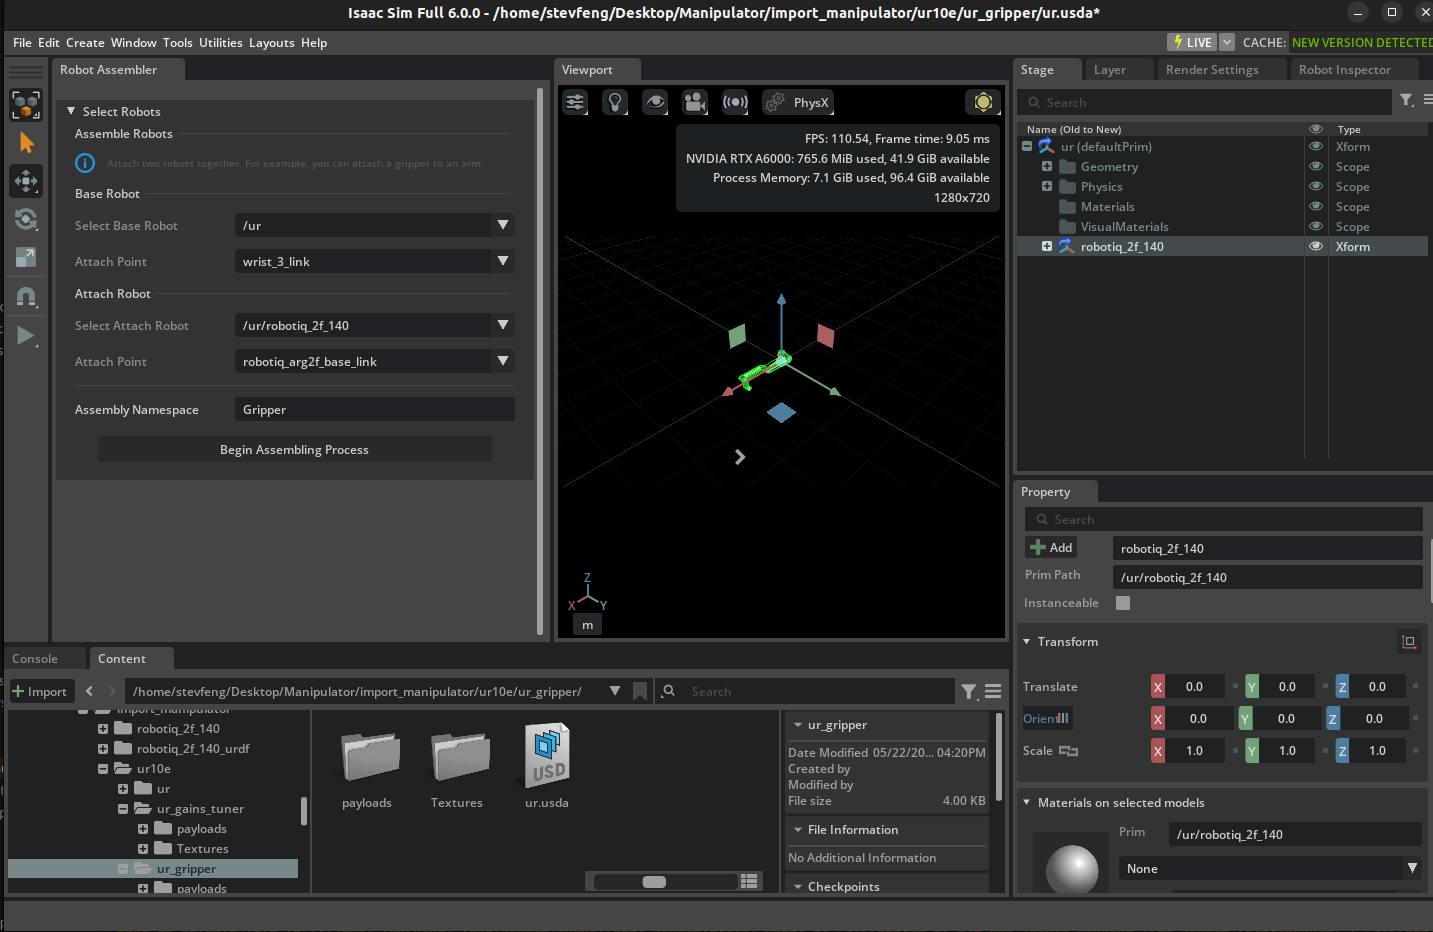
With the Robot Assembler window open and both Robots available in the current stage, you can select a Base Robot and an Attach Robot.
Each robot has an “Attach Point” frame that can be used to specify the point on the robot that will be attached to the other robot. This attach point should be a Robot Link or a Site.
The Assembler also expects an assembly namespace, which defaults to “Gripper”, but can be changed to any string. This namespace is used to identify the attachment point on the base robot when making the assembly directly on the base robot asset.
After selections are made, click on the Begin Assembly button to begin the assembly process. This will move the “Attach Robot” to the “Attach Point” of the “Base Robot”, and let you make any final adjustments to the transform. For convenience, a set of Buttons will be shown to allow you to rotate the “Attach Robot” around the X, Y, and Z axes, by increments of 90 degrees. You can also move it through the viewport gizmos however you choose. If you de-select the “attach robot”, the Select Attach Point Prim button will re-select it so you can manually move it to the desired position.
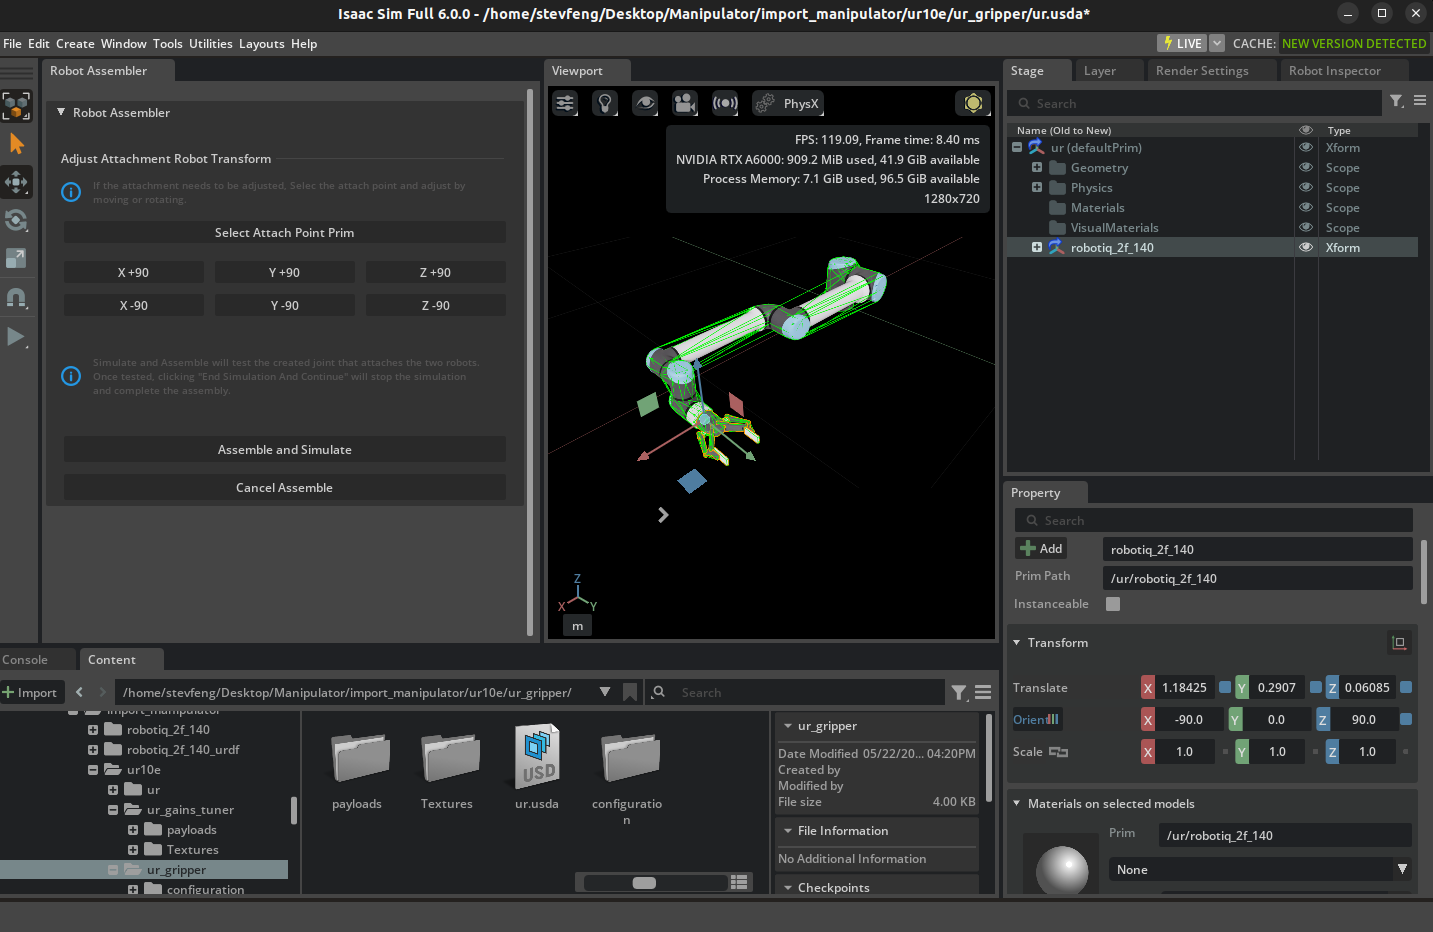
After you are happy with the transform, you can click on the Assemble and Simulate button to verify the assembly and check if the resulting robot is stable.
At any point, you can click on the Cancel Assemble button to undo the assembly and start over.
After assembly and simulation, you can click on the End Simulation and Finish button to save the assembly.
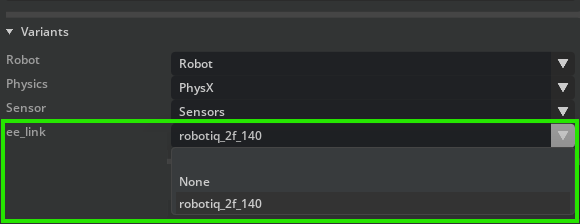
If the assembly is performed on the Base asset stage, the resulting assembly is saved as a configuration option under configuration/<robot_name>_<assembly_namespace>_<attach_robot_name>.usd, and the <assembly_namespace> will be used to create a Variant set on the robot interface layer, such that the new attachment can be selected for use wherever the base robot is used. While the configuration file is automatically saved, you must save the stage to keep the changes.
If the base robot is loaded as a reference, the attachment will be available on the open stage directly, without configuration through variants, and you can save the stage to keep the changes.
With the robot assembled, you might need to execute additional tests to verify simulation stability, given that the articulation system is changed. For a complete guide in tuning articulations, refer to Articulation Stability Guide.
Robot Assembler API#
The Robot Assembler can also be accessed by a Python API, where the assembly settings can be specified programmatically.
import omni
from isaacsim.robot_setup.assembler import RobotAssembler

# Prerequisites: Have both the base robot and the attach robot loaded in the stage at the paths specified below (or change the paths to where the assets are loaded in your stage)

# Prim path to the base robot
robot_base = "/World/BaseRobot"
# Prim path to the mount point of the base robot
robot_base_mount = "/World/BaseRobot/Mount"
# Prim path to the attach robot
robot_attach = "/World/AttachRobot"
# Prim path to the mount point of the attach robot
robot_attach_mount = "/World/AttachRobot/Mount"
# Assembly namespace
assembly_namespace = "Gripper"
variant_name = "my_assembled_robot"


stage = omni.usd.get_context().get_stage()
assembler = RobotAssembler()


# Begin the Assembly process - Creates a session layer and attach it to the current stage, where all the modifications necessary for the assembly will be made.
assembler.begin_assembly(
    stage, robot_base, robot_base_mount, robot_attach, robot_attach_mount, assembly_namespace, variant_name
)

# Perform any Additional transformations on the Attach robot pose here directly through USD.

assembler.assemble()

# That's where the Robot Assembler will create the fixed joint between the two robots.
# It will also remove Physic's Articualtion Root from the attached robot, and disable the root joint that attaches 	robot to the world, if it exists.
# If you need to perform any physics simulation test - this is the time to do it.
# If the assembly is successful, and you are ready to finish the assembly, you can call the following function.
# Otherwise at any point you can call the `assembler.cancel_assemble()` function to cancel the assembly process.
# It will remove the session layer from the stage, undoing any changes made to the stage.


assembler.finish_assemble()

# This function will finish the assembly process by adding the attachment link to the parent robot joint and link lists, and then either merge the session layer into the current stage, or save a configuration file, and remove the session layer from the stage.
# If modifing a robot asset directly, it will also create the variant set to load the configuration for the assembled component through a payload.
Summary#
In this tutorial, you learned that:
The Robot Assembler tool exists to attach two robots or rigid bodies using a user-specified fixed joint.
The Robot Assembler creates a fixed joint that is physically simulated, and so it will only be active while the timeline is playing.
The Robot Assembler is only needed to attach Robot components together.
The Robot Assembler can also be accessed by a Python API that is demonstrated on the example code above.