Tutorial: Import MJCF#
Learning Objectives#
This tutorial shows how to import a MJCF model and convert it to a USD in NVIDIA Isaac Sim. After this tutorial, you can use MJCF files in your pipeline while using NVIDIA Isaac Sim.
5-10 Minute Tutorial
Getting Started#
Prerequisites
Review the Quick Tutorials prior to beginning this tutorial.
Using the MJCF Importer#
Begin by importing an Ant MJCF from the Built in MJCF files that come with the extension.
Load the MJCF Importer extension, which should be automatically loaded when NVIDIA Isaac Sim opens and can be accessed from the File > Import menu. If not MJCF files are not listed in the import formats, go to Window > Extensions and enable
isaacsim.asset.importer.mjcfandisaacsim.asset.importer.mjcf.uiextensions.In the file selection dialog box, navigate to the desired folder, and select the desired MJCF file. For this example, use the Ant
nv_ant.xmlfile that comes with this extension, included in the extension assets. To find it:Click on the folder icon beside AUTOLOAD to find the isaacsim.asset.importer.mjcf extension.
Navigate to
/data/mjcfand findnv_ant.xmlfile.
Change the import options according to the your needs. Check Import Options for more information on the import options.
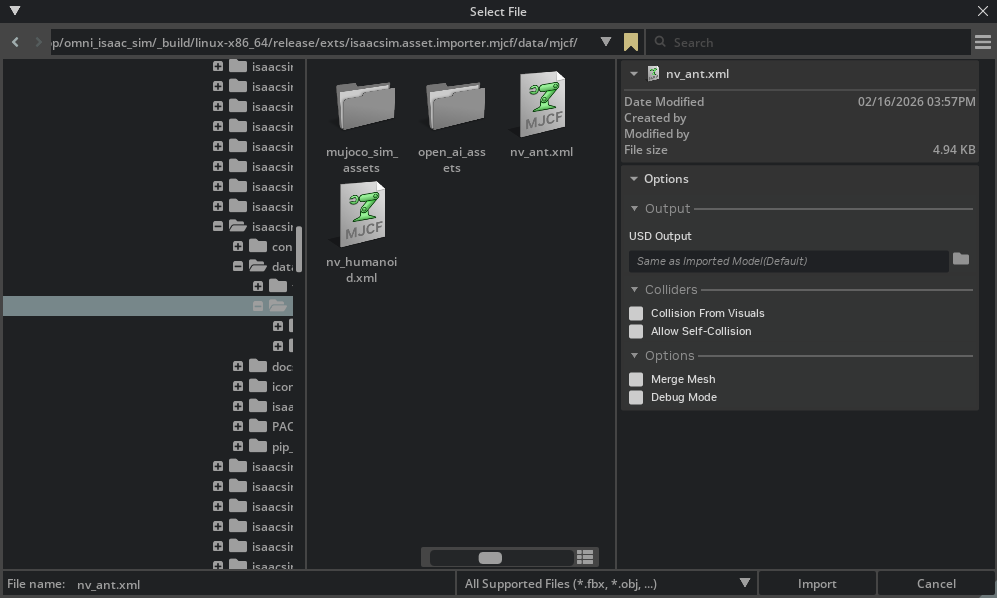
Click the Import button to add the robot to the stage.
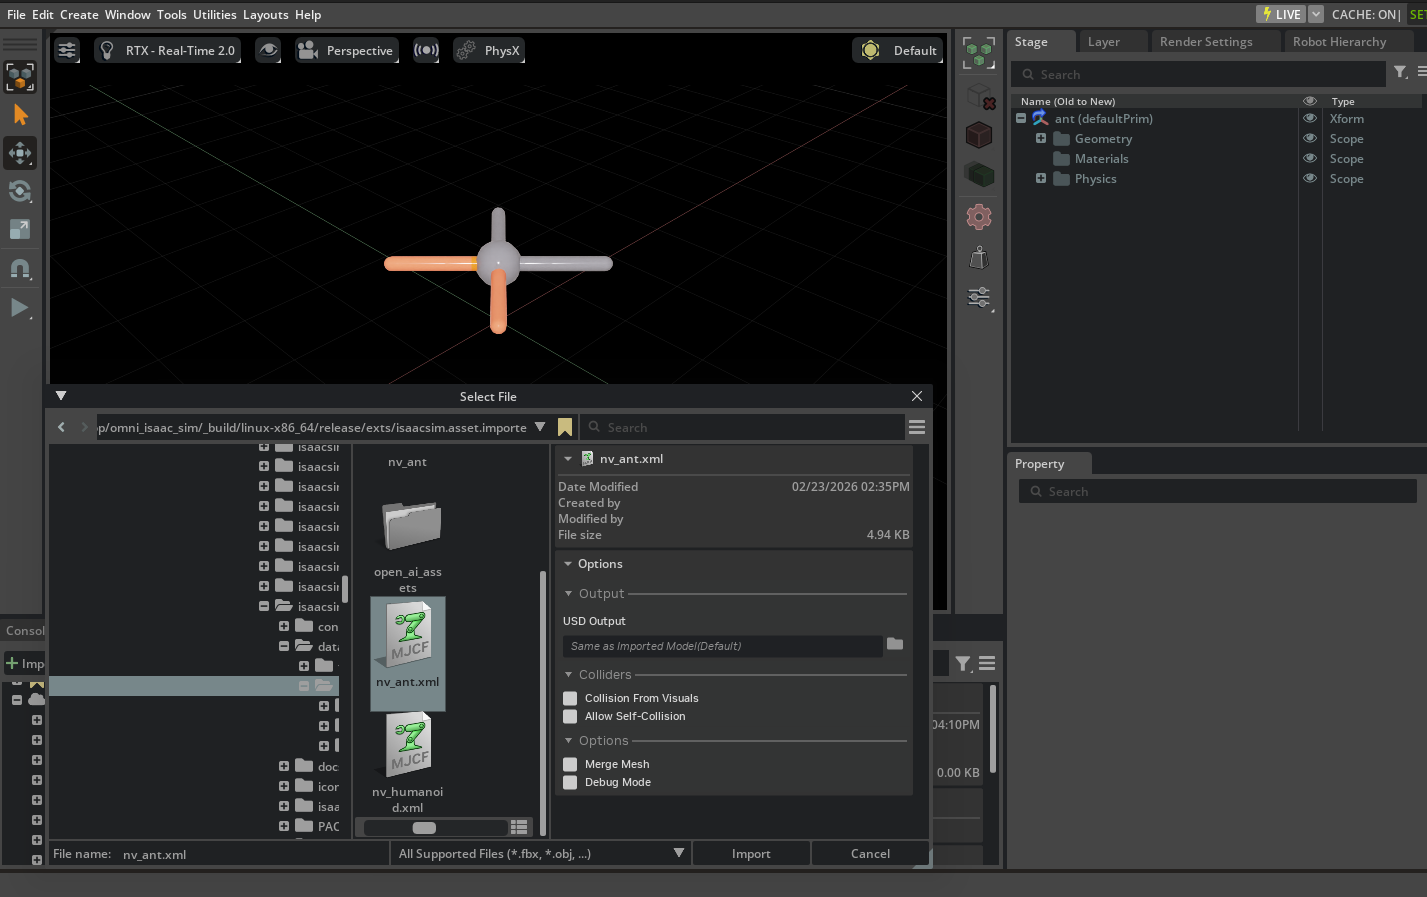
The robot is now imported into the stage. You can now use it in your simulation. You can perform additional changes to the asset after it’s imported, such as adding sensors, changing materials, and updating the joint drives and configuration to achieve a more stable simulation. Robots are mapped as articulations in the simulation, and for a complete guide in tuning articulations, refer to Articulation Stability Guide.
Importing MJCF Using Python API#
Do the exact same thing with Python scripting instead.
Open the Script Editor. Go to the top Menu Bar and click Window > Script Editor.
The window for the Script Editor is visible in the workspace.
Copy the following code into the Script Editor window.
import isaacsim.core.experimental.utils.stage as stage_utils
import omni.usd
from isaacsim.asset.importer.mjcf import MJCFImporter, MJCFImporterConfig
from pxr import Gf, PhysicsSchemaTools, Sdf, UsdLux, UsdPhysics

# create new stage
omni.usd.get_context().new_stage()

# Get path to extension data:
ext_manager = omni.kit.app.get_app().get_extension_manager()
ext_id = ext_manager.get_enabled_extension_id("isaacsim.asset.importer.mjcf")
extension_path = ext_manager.get_extension_path(ext_id)

# setting up import configuration:
import_config = MJCFImporterConfig(mjcf_path=extension_path + "/data/mjcf/nv_ant.xml")

# import MJCF
importer = MJCFImporter(import_config)
output_usd_path = importer.import_mjcf()

# open the imported USD file into the current stage
result, stage = stage_utils.open_stage(output_usd_path)

# enable physics
scene = UsdPhysics.Scene.Define(stage, Sdf.Path("/physicsScene"))

# set gravity
scene.CreateGravityDirectionAttr().Set(Gf.Vec3f(0.0, 0.0, -1.0))
scene.CreateGravityMagnitudeAttr().Set(9.81)

# add lighting
distantLight = UsdLux.DistantLight.Define(stage, Sdf.Path("/DistantLight"))
distantLight.CreateIntensityAttr(500)
Click the Run (Ctrl + Enter) button to import the Ant robot.
Importing MJCF Using Python Standalone#
Do the exact same thing with Python standalone instead.
Open a terminal and navigate to the root of the Isaac Sim installation.
Run the following command:
./python.sh standalone_examples/api/isaacsim.asset.importer.mjcf/mjcf_import.py- Args:
--mjcf: Path to an MJCF file (.xml) or a directory containing MJCF files to import.--usd-path: Directory to write converted USD assets.--robot-type: Robot type for the Isaac robot schema. One of: Default, End Effector, Manipulator, Humanoid, Wheeled, Holonomic, Quadruped, Mobile Manipulators, Aerial (default: Default).--import-scene: Import the MJCF simulation settings along with the model (default: True).--merge-mesh: Merge meshes after conversion.--debug-mode: Enable debug mode and keep intermediate outputs.--collision-from-visuals: Generate collision geometry from visuals.--collision-type: Collision geometry type (e.g. “Convex Hull”, “Convex Decomposition”, “Bounding Sphere”, “Bounding Cube”).--allow-self-collision: Allow self-collision for the imported asset.--fix-base/--no-fix-base: Tri-state base-type toggle. Pass--fix-baseto anchor the robot to the world via a fixed joint. Pass--no-fix-baseto strip any existing world-to-root fixed joint so the robot is floating-base. Omit the flag entirely to leave the source asset’s base authoring untouched (default).--link-density: Default density (kg/m^3) for rigid body links with no explicit mass.--override-gain-type: MuJoCo actuator gain type (e.g."fixed").--override-bias-type: MuJoCo actuator bias type (e.g."affine").--override-gain-prm: MuJoCo actuator gain parameter array (up to 10 floats, space-separated).--override-bias-prm: MuJoCo actuator bias parameter array (up to 10 floats, space-separated).--run-asset-transformer: Run asset transformer after conversion (default: True).--run-multi-physics-conversion: Run multi-physics conversion after conversion (default: True).--test: Use the built-innv_ant.xmltest asset and write output to a temp directory.
Example:
./python.sh standalone_examples/api/isaacsim.asset.importer.mjcf/mjcf_import.py --mjcf /path/to/nv_ant.xml --usd-path /path/to/output --merge-mesh
Known Issues#
In USD, a joint is defined as a kinematics constraint between two rigid bodies. When a joint is created, the DOF is limited only to the axis of the joint. For example, a revolute joint has only one DOF, and removes the other five DOFs.
In MuJoCo, a joint is defined as a degree of freedom, enabling multiple joints to be combined together to create more degrees of freedoms. For example, an x-axis revolute joint and a y-axis revolute joint can be combined together to create a 2D x-y axis revolute joint. This is not supported in USD, if two revolute joints between two bodies are defined, the system would form a kinematic loop, and become overconstrained.
The MJCF importer will automatically convert multi-DOF joints between the same body pair into a single D6 joint in the PhysX variant, the physics and mujoco/newton variants will keep the original per-DOF joints. Because of this, mujoco and physx assets cannot transfer directly between each other.
If you want to retain every DOF and avoid this conversion, you can edit the MJCF to insert a zero-mass dummy link between the parent and child and split the multi-DOF joint into one single-DOF joint per intermediate edge. For example, two revolute joints between body A and body B become: a revolute between A and a dummy link, plus a revolute between the dummy link and B.
Summary#
This tutorial covered the following topics:
Importing MJCF file using GUI
Importing MJCF file using Python API
Importing MJCF file using Python Standalone
Further Learning#
Review MJCF Importer Extension to learn more about the different configuration settings to import a MJCF in NVIDIA Isaac Sim. Learn how to use the Gain Tuner Extension to tune the gains for your robot.