RMPflow Tutorial#
This tutorial demonstrates how to use the RmpFlowController class in the cuMotion integration to generate smooth, reactive motions that reach task-space targets while avoiding dynamic obstacles.
By the end of this tutorial, you’ll understand:
How to create and configure the
RmpFlowControllerHow to update world state for dynamic environments
Prerequisites
Review the Robot Configuration tutorial to understand how to load robot configurations.
Review the Controllers and the RobotState tutorial to understand the
BaseControllerinterface andRobotState.Review the World Interface tutorial to understand how to set up
CumotionWorldInterface.
To follow along with the tutorial, run your Isaac Sim instance. Then open Window > Extensions, search for cuMotion Examples (isaacsim.robot_motion.cumotion.examples), and enable it. If you cannot find it, remove @feature from the Extensions search bar and search again.
Within the isaacsim.robot_motion.cumotion.examples extension, there is a fully functional example of RMPflow including following a target, world awareness,
and obstacle avoidance.
Key Concepts#
The RmpFlowController implements the BaseController interface from the Motion Generation API, enabling reactive motion control that:
Reaches task-space targets: The controller drives the robot’s end-effector to a target position and orientation
Avoids obstacles: Uses the
CumotionWorldInterfaceto access obstacle information for collision avoidance
Setting Up the Controller#
First, set up a CumotionWorldInterface as described in the World Interface tutorial.
In this tutorial, we will use a WorldBinding to conveniently initialize the obstacles in the CumotionWorldInterface.
Once you have a CumotionWorldInterface, you can create the controller:
    # Get robot joint and site names
    robot_joint_space = articulation.dof_names
    robot_site_space = cumotion_robot.robot_description.tool_frame_names()
    tool_frame = robot_site_space[0]

    # Create RMPflow controller
    controller = RmpFlowController(
        cumotion_robot=cumotion_robot,
        cumotion_world_interface=world_binding.get_world_interface(),
        robot_joint_space=robot_joint_space,
        robot_site_space=robot_site_space,
        tool_frame=tool_frame,
    )
The controller needs:
Robot configuration: A cuMotion robot configuration (retrieved via
load_cumotion_supported_robot()). See the Robot Configuration tutorial for details on loading robot configurations.World interface: A
CumotionWorldInterfaceinstanceJoint and site spaces: The full ordered control spaces for the robot joints and sites (see the Motion Generation API documentation for more details)
Tool frame: The name of the end-effector frame to control - at initialization, the controller will confirm that the tool frame is in the site space
If the tool frame is not provided, the controller will use the first tool frame defined in the cuMotion robot description.
Creating RobotState Objects#
The controller requires RobotState objects for the estimated state (current robot state) and setpoint state (target end-effector pose). For details on RobotState creation, see the Motion Generation API documentation.
Estimated State (current robot configuration):
    # Get current robot state
    robot_joint_space = articulation.dof_names

    # Create estimated state (current robot state)
    estimated_state = mg.RobotState(
        joints=mg.JointState.from_name(
            robot_joint_space=robot_joint_space,
            positions=(robot_joint_space, articulation.get_dof_positions()),
            velocities=(robot_joint_space, articulation.get_dof_velocities()),
        )
    )
Setpoint State (target end-effector pose):
    # Create setpoint with target end-effector pose
    tool_frame_name = cumotion_robot.robot_description.tool_frame_names()[0]
    robot_site_space = cumotion_robot.robot_description.tool_frame_names()

    # Get target pose (example: from a target object)
    target_positions, target_orientations = target_object.get_world_poses()

    setpoint_state = mg.RobotState(
        sites=mg.SpatialState.from_name(
            spatial_space=robot_site_space,
            positions=([tool_frame_name], target_positions),
            orientations=([tool_frame_name], target_orientations),
        ),
    )
Resetting the Controller#
Before the controller can be used, it must be reset once with the estimated state, setpoint state, and clock time. The reset() method:
Clears any internal RMPflow setpoints on the tool frame
Sets the joint-space setpoint equal to the current estimated joint pose of the robot (i.e., initial desired state is where the robot already is, which is the safest)
Initializes the internal RMPflow algorithm
The forward() method cannot run before reset() is called successfully (it must return True).
    # Reset the controller - must return True before forward can be called
    success = controller.reset(estimated_state, setpoint_state, t=t)
    if not success:
        raise RuntimeError("Controller reset failed. Check that estimated_state contains all required joint positions.")
Running the Controller#
The controller uses the BaseController interface. In each update step, you need to:
Get the current robot state (estimated state)
Create a setpoint state with the target end-effector pose
Call the controller’s
forward()methodApply the resulting desired state to the robot
If the setpoint state is set to None, then the controller continues to track the prior setpoint state.
    # Get desired state from controller (t is the clock time, not a time step)
    desired_state = controller.forward(estimated_state, setpoint_state, t)

    # Apply action to articulation
    if desired_state is not None and desired_state.joints.positions is not None:
        articulation.set_dof_position_targets(
            positions=desired_state.joints.positions,
            dof_indices=desired_state.joints.position_indices,
        )
Updating World State#
The world binding must be updated each frame to track moving obstacles and robot base movements. This is critical for dynamic environments:
    # Update robot base transform
    world_binding.get_world_interface().update_world_to_robot_root_transforms(articulation.get_world_poses())

    # Synchronize transforms (updates all obstacles and world state)
    world_binding.synchronize_transforms()
For more details on world state synchronization, see the World Interface tutorial.
Accessing cuMotion Parameters#
The controller provides access to the underlying cuMotion RMPflow configuration for parameter modification:
    # Get the underlying cuMotion config
    rmpflow_config = controller.get_rmp_flow_config()

    # Modify parameters using set_param
    rmpflow_config.set_param("cspace_target_rmp/damping_gain", 0.9)
For a complete list of available parameters and their usage, see the cuMotion Python and C++ API documentation.
Configuring rmp_flow.yaml#
The rmp_flow.yaml file controls all RMPflow parameters. Save it alongside robot.urdf and robot.xrdf in your robot configuration directory (see Robot Configuration Tutorial).
Key |
Purpose |
|---|---|
|
Per-joint safety margin (radians) applied inside the URDF joint limits. |
|
Per-RMP gain and weight parameters (see table below). |
|
Global acceleration norm cap and solver verbosity. |
|
Self-collision avoidance geometry (see below). |
RMP Parameter Groups#
Group |
Purpose |
Key params to tune |
|---|---|---|
|
Pulls joints toward a preferred posture (redundancy resolution). |
|
|
Drives the end-effector position to the Cartesian target. |
|
|
Drives end-effector orientation to the target. |
|
|
Soft velocity limiter — set |
|
|
Repels the robot from obstacles registered in the world interface. |
|
|
Smooth global damping to reduce oscillation. |
|
|
Repels joints away from their soft limits. |
|
Self-Collision Avoidance#
body_capsules define fixed-frame capsules (specified by two absolute-coordinate endpoints and a radius) that approximate the robot base or other stationary links. body_collision_controllers place spheres at named URDF frames on the moving arm. RMPflow prevents any controller sphere from intersecting any body capsule.
Start with one capsule covering the robot base and one sphere near the end effector, then add more geometry only if you observe self-collisions in practice.
For a step-by-step tuning procedure, see the RMPflow Tuning Guide.
Example Usage#
Note
To experiment with this tutorial interactively, see the scenario.py file in the isaacsim.robot_motion.cumotion.examples extension at isaacsim/robot_motion/cumotion/examples/rmp_flow/scenario.py.
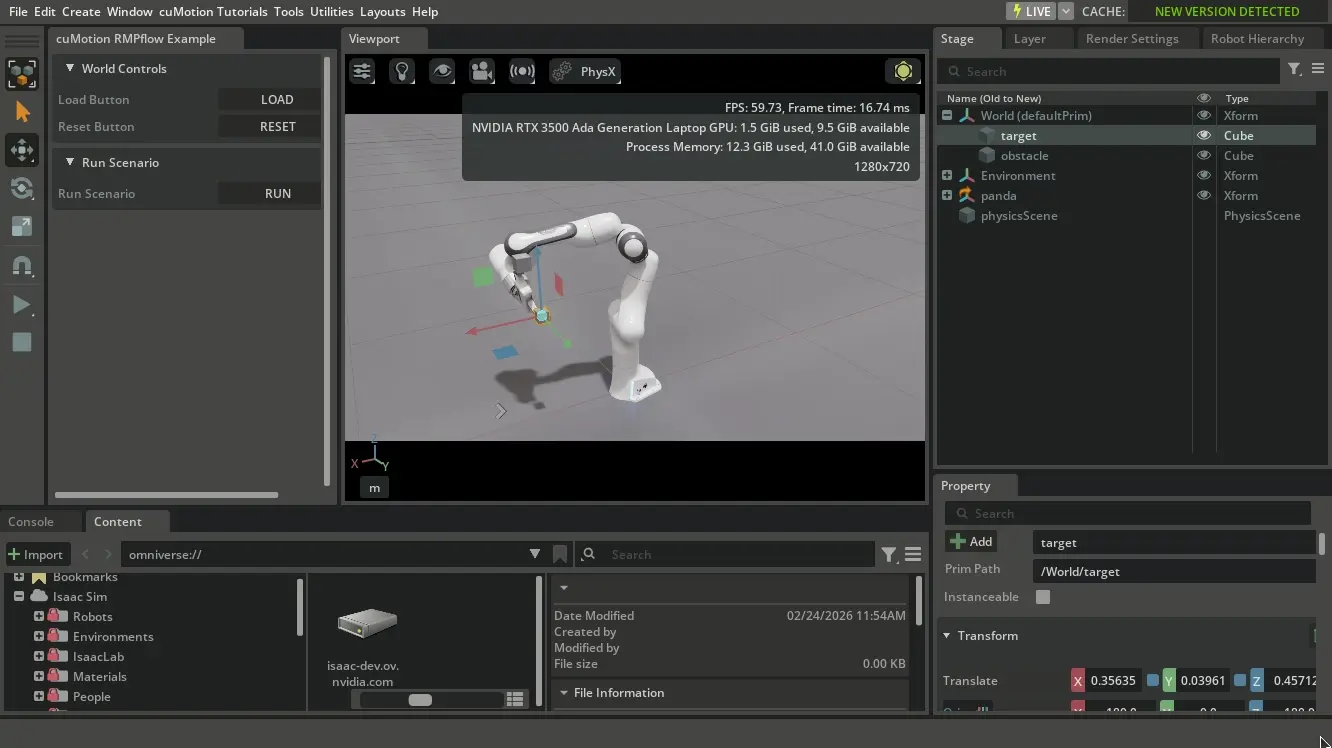
The following videos show RMPflow as demonstrated in the isaacsim.robot_motion.cumotion.examples extension.
Note that in these videos, the setting visualize_debug_prims is left at the default False. Therefore,
there are no prims to visualize the internal cuMotion World objects.
The first video shows RMPflow controlling the robot to reach a target while avoiding obstacles in the scene.
RMPflow tracking a target while avoiding obstacles#
The second video demonstrates adding a new obstacle to the scene, resetting the world state, and running RMPflow again.
Objects are added in the same way as described in the World Interface tutorial.
Inside the scenario.py file, a new CumotionWorldInterface is created every time the tutorial is reset. This is not generally necessary
if objects are not being added or removed from the scene.
Adding an obstacle, resetting the cuMotion world, and running RMPflow again#
Summary#
This tutorial demonstrated:
RmpFlowController Setup: Creating the
RmpFlowControllerwith aCumotionWorldInterfacefor obstacle awarenessRobotState Creation: Properly creating
RobotStateobjects for the controller interfaceRmpFlowController Usage: Using the
reset()andforward()methods to compute desired motions that reach targets while avoiding obstaclesWorld Updates: Updating the world state each frame for dynamic environments
Parameter Access: Accessing underlying cuMotion objects for advanced configuration
The RmpFlowController provides reactive, obstacle-aware motion control that integrates seamlessly with the Motion Generation API.
Next Steps#
Graph Planner tutorial - Sampling-based path planning
Trajectory Generator tutorial - Trajectory-based motion
Trajectory Optimizer tutorial - Optimization-based trajectory planning
cuMotion library documentation - Advanced parameter configuration