Camera Sensors#
Cameras are modeled using the Camera USD prim type. Camera data is acquired from camera prims using render products, which can be created by multiple different extensions in Omniverse, including the omni.replicator extension.
Note
Isaac Sim camera functionality is based on Omniverse cameras.
Deprecated since version 6.0: The isaacsim.sensors.camera extension is deprecated. Use isaacsim.sensors.experimental.rtx instead.
The new extension provides RtxCamera, CameraSensor, TiledCameraSensor,
SingleViewDepthCameraSensor, and StructuredLightCamera with a uniform authoring/runtime
split. See Camera Sensors.
Overview#
Isaac Sim cameras are USD Camera prims rendered by the RTX renderer. The
isaacsim.sensors.experimental.rtx extension wraps these prims with two paired classes:
Authoring —
RtxCameracreates or wraps a USDCameraprim, applies theOmniSensorAPIschema, and exposes the optical parameters (focal length, aperture, clipping range) through its.cameraproperty.Runtime —
CameraSensorwraps anRtxCameraobject, creates a Replicator render product at a specified resolution, attaches annotators (rgb,distance_to_camera,semantic_segmentation, etc.), and providesget_data()for retrieving rendered frames as numpy/warp arrays.
Two specialized camera variants extend this base — SingleViewDepthCameraSensor for
stereoscopic depth simulation and StructuredLightCamera for projected-pattern depth
recovery. See Specialized Camera Types below.
How to Create a Camera#
Isaac Sim supports creating camera prims through the GUI Create menu or
programmatically via the RtxCamera class.
Create from the Create Menu#
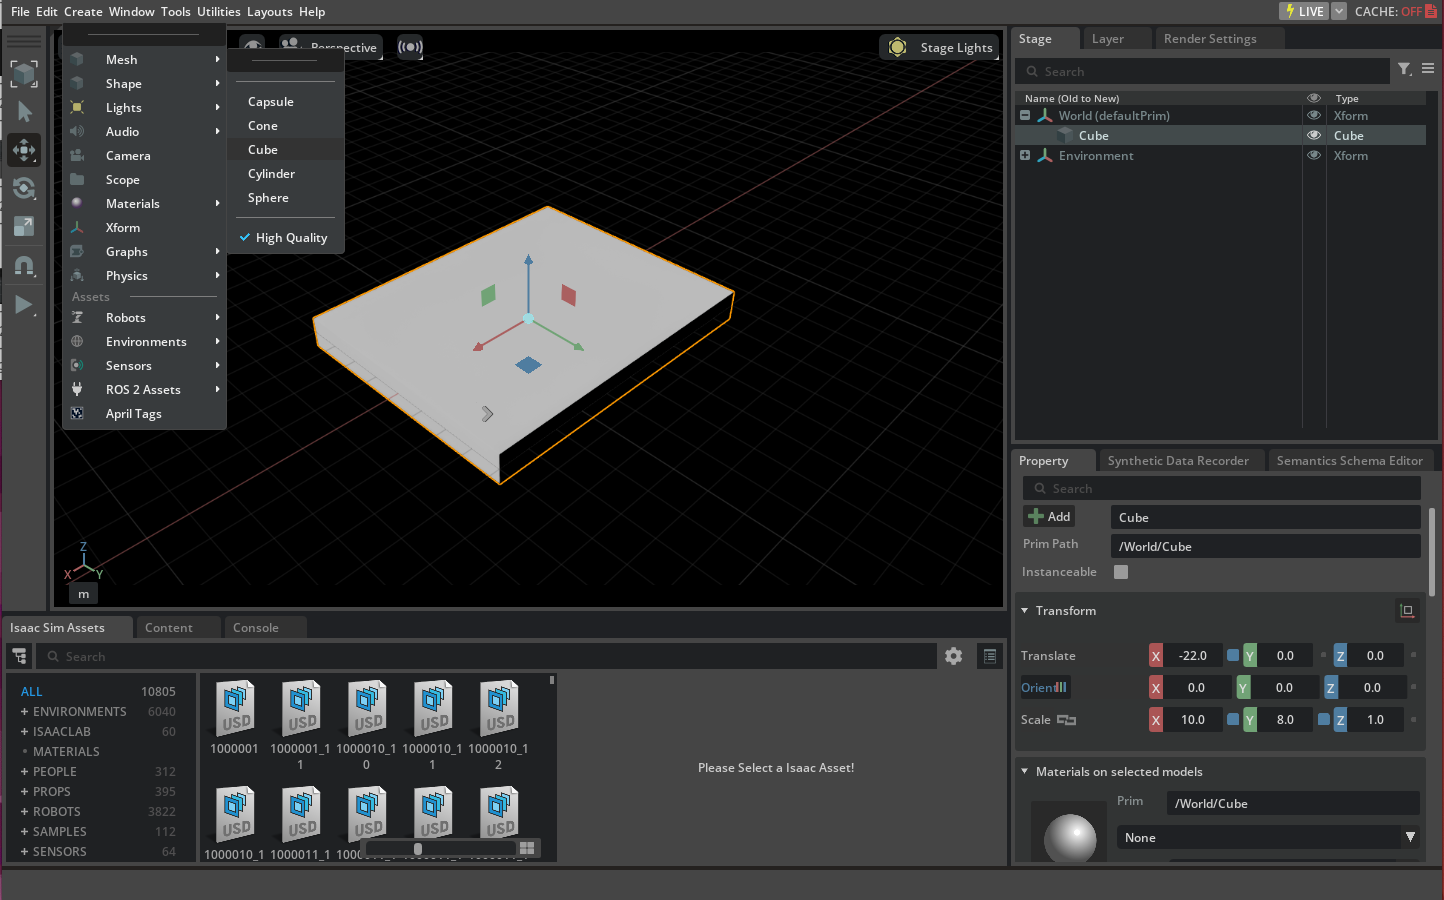
Create a cube by selecting Create > Shape > Cube and change its location and scale through the property panel as indicated in the screenshot below.
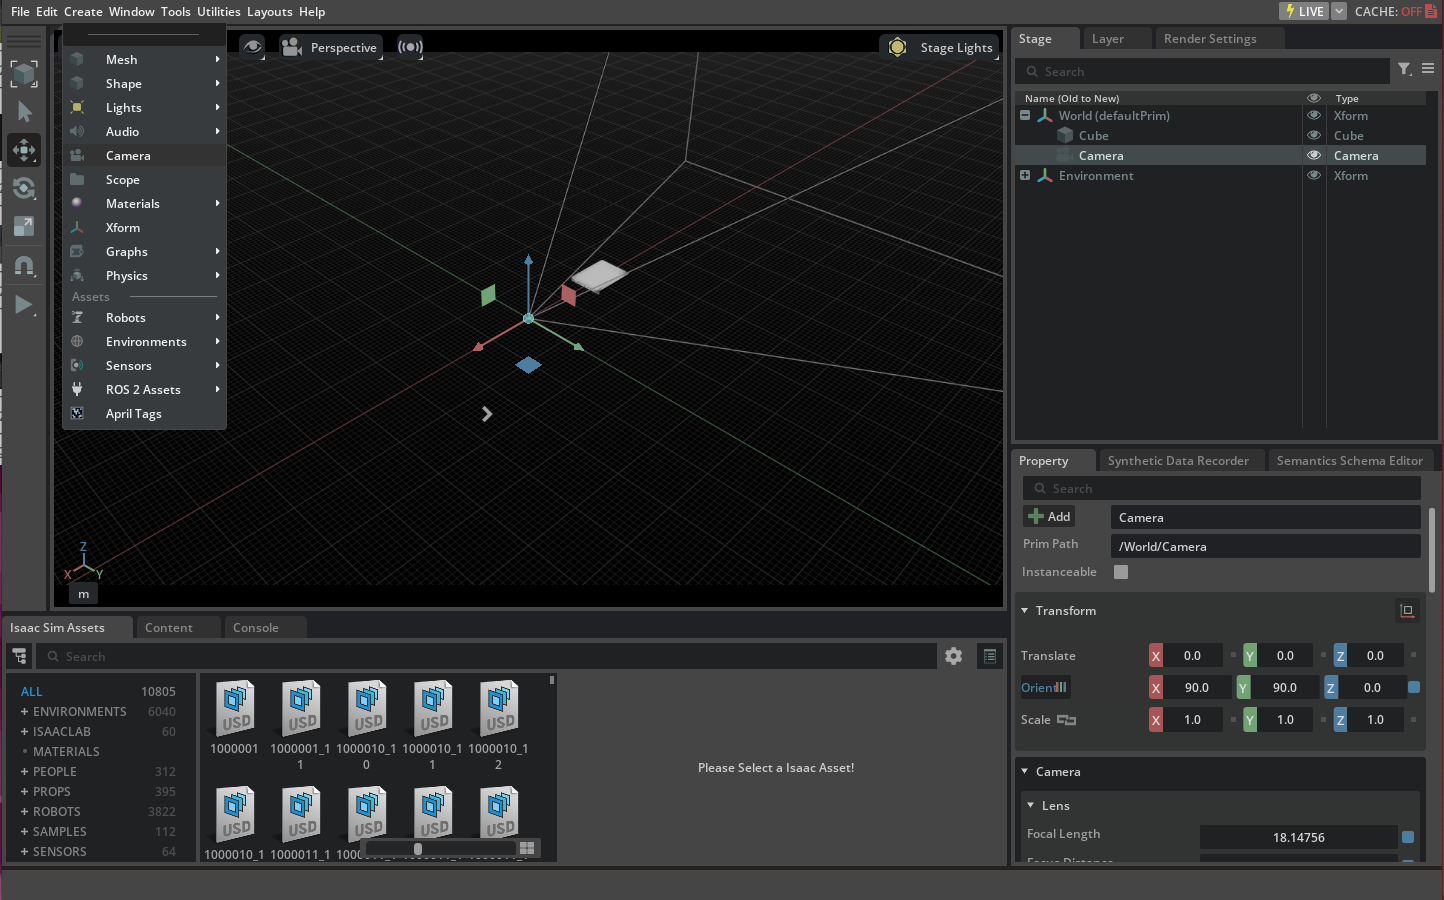
Create a camera prim by selecting Create > Camera and then select it from the stage window to view its field of view as indicated below.
To render the frames from the camera, switch the default viewport (which is a render product itself) to the camera prim that you just created. Select the video icon at the top of the viewport window and then select the camera prim you just created under the
Camerasmenu.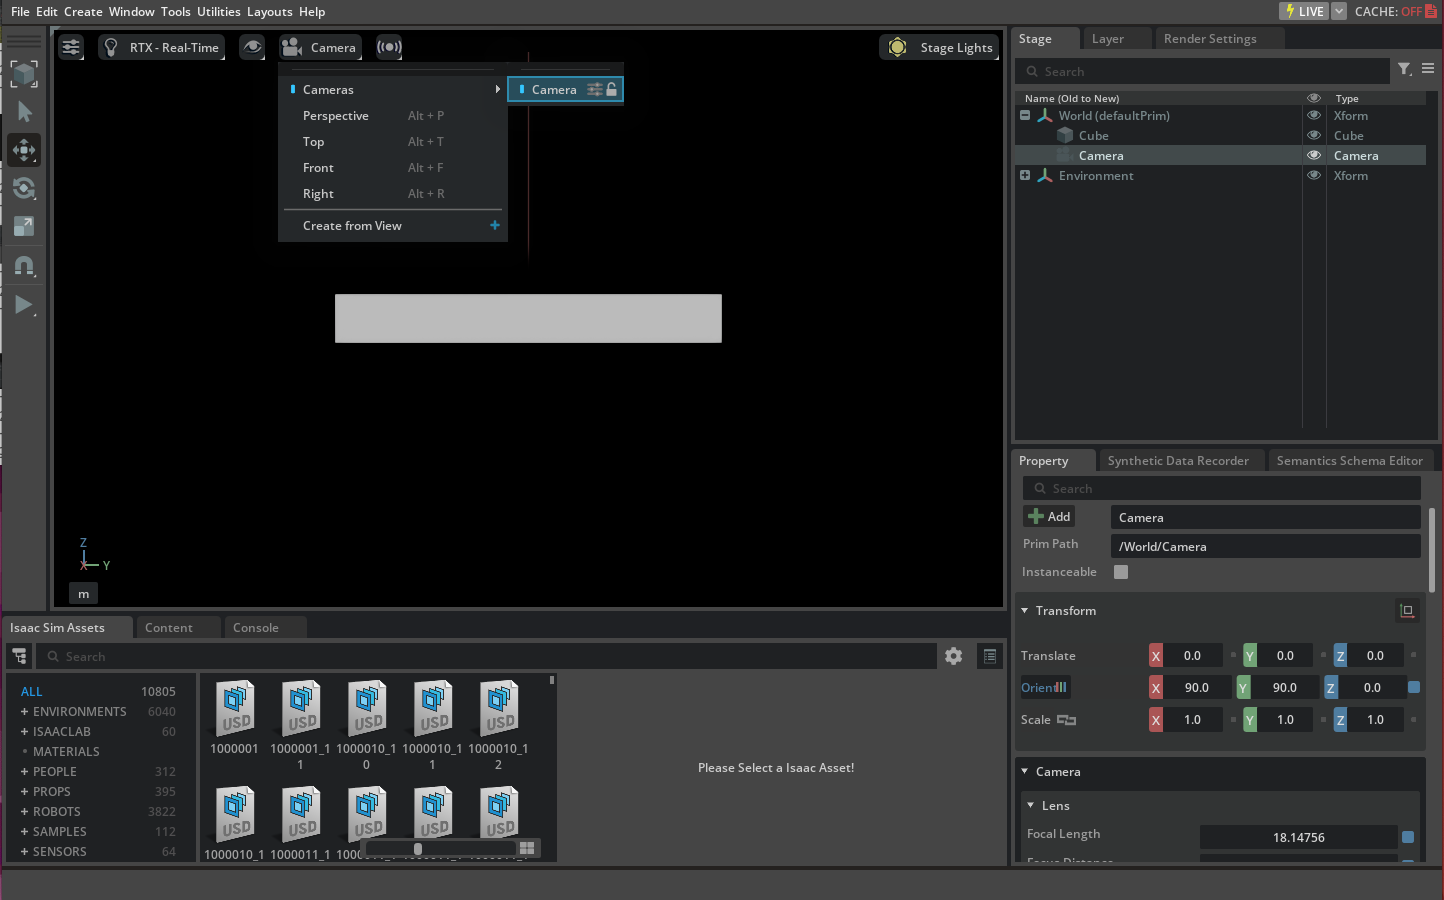
Create with the RtxCamera Class#
The RtxCamera authoring class creates (or wraps) a Camera prim with the OmniSensorAPI schema applied,
sets transforms via plural-array constructor parameters (positions, translations, orientations, scales),
and exposes optical parameters through its .camera property. The standalone example
standalone_examples/api/isaacsim.sensors.experimental.rtx/create_camera_basic.py demonstrates
the full create-and-read workflow:
./python.sh standalone_examples/api/isaacsim.sensors.experimental.rtx/create_camera_basic.py
The example loads a warehouse environment, creates an RtxCamera at /World/camera, attaches
rgb and distance_to_image_plane annotators via CameraSensor, and saves a rendered
RGB frame to disk every 100 ticks under
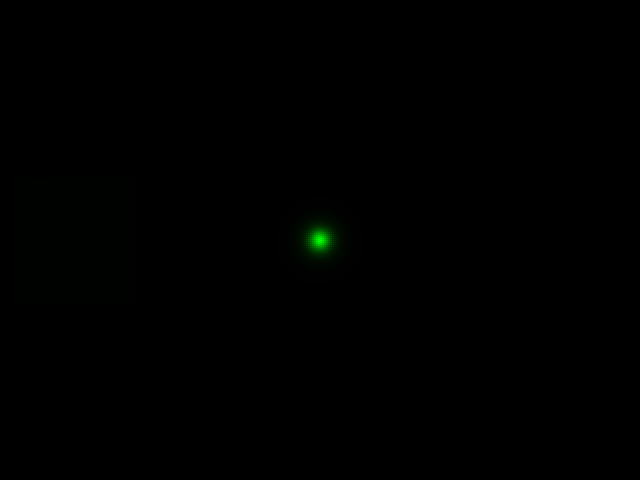
_example_output_isaacsim.sensors.experimental.rtx/create_camera_basic/. The frame at tick 100
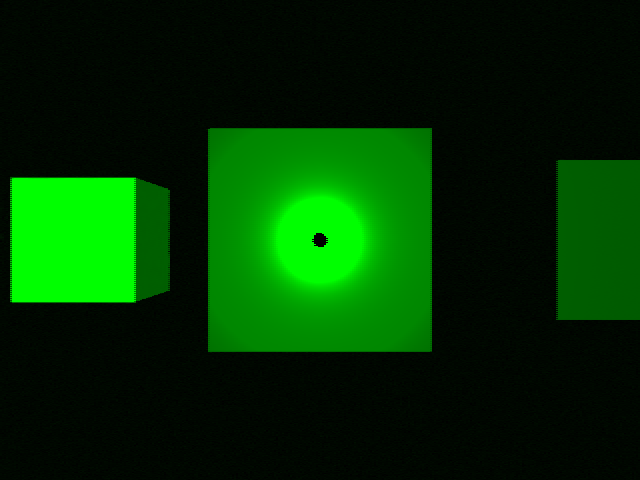
looks like:
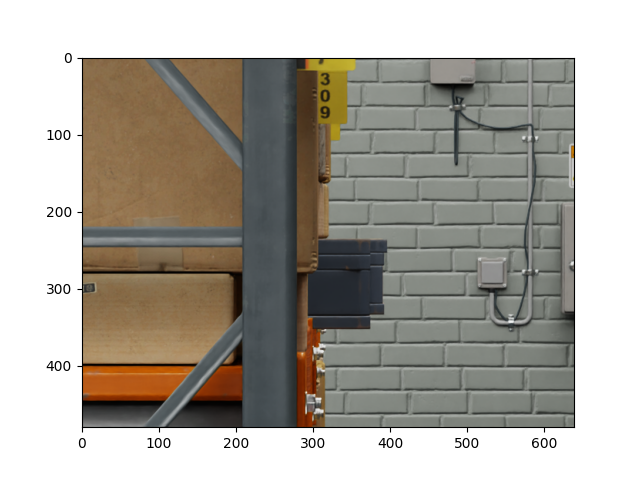
RGB frame saved by create_camera_basic.py (tick 100, 480x640).#
Tick Rate#
The tick_rate parameter (Hz) on RtxCamera controls how frequently the camera renders. A value
of 0 (the default) enables autotrigger mode, where the camera renders every simulation frame.
Setting a nonzero value causes the camera to render at the specified frequency independently of the
simulation step rate. This maps to the omni:sensor:tickRate prim attribute and requires the
OmniSensorAPI schema to be applied to the Camera prim — RtxCamera does this automatically.
from isaacsim.sensors.experimental.rtx import RtxCamera

# Render the Camera at 30 Hz independently of the simulation frame rate.
camera = RtxCamera(path="/World/Camera", tick_rate=30.0)
tick_rate is the recommended replacement for the deprecated frameSkipCount input on
ROS2 Camera Helper, ROS2 Camera Info Helper, and UCX Camera Helper nodes. See
Multi-Tick Rendering for the full migration guide and the list of
related known issues.
How to Collect Data from a Camera#
The recommended method for collecting data from a camera is to use the CameraSensor runtime class,
which wraps an RtxCamera authoring object and manages Replicator annotators on its render product.
For batched multi-camera workflows, use TiledCameraSensor. For stereoscopic depth simulation, use
SingleViewDepthCameraSensor (see
Specialized Camera Types for the full sub-page).
Annotators#
CameraSensor accepts a list of annotator names (rgb, distance_to_camera,
distance_to_image_plane, semantic_segmentation, motion_vectors, etc.) at construction
time and exposes the latest data through get_data("annotator-name"), which returns a
(warp.array, info_dict) tuple. Run the basic example to see rgb and
distance_to_image_plane collection end-to-end:
./python.sh standalone_examples/api/isaacsim.sensors.experimental.rtx/create_camera_basic.py
To select between CPU- and CUDA-resident annotator buffers, see the standalone example
standalone_examples/api/isaacsim.sensors.experimental.rtx/camera_annotator_devices.py.
Tiled / Batched Cameras#
TiledCameraSensor packs many cameras into a single tiled render product, which is significantly
more efficient than one render product per camera for reinforcement-learning and multi-environment
workflows. Pass an explicit list of camera prim paths (or an isaacsim.core.experimental.objects.Camera
instance) plus a per-tile resolution:
./python.sh standalone_examples/api/isaacsim.sensors.experimental.rtx/camera_tiled.py
Single-View Depth Cameras#
SingleViewDepthCameraSensor extends CameraSensor with stereoscopic-depth simulation
post-processing (disparity, baseline, noise, outlier removal). See the
Single-View Post-Processing Pipeline sub-page for the full pipeline
description. End-to-end example:
./python.sh standalone_examples/api/isaacsim.sensors.experimental.rtx/camera_stereoscopic_depth.py
Specialized Camera Types#
Two specialized camera sensors build on RtxCamera and CameraSensor for depth and structured-light workflows:
Advanced Topics#
Calibration and Camera Lens Distortion Models#
Omniverse cameras support a variety of lens distortion models, described here.
The RtxCamera class from isaacsim.sensors.experimental.rtx supports applying lens distortion schemas (e.g. OmniLensDistortionOpenCvFisheyeAPI, OmniLensDistortionOpenCvPinholeAPI) via the schemas parameter and setting distortion coefficients via the attributes parameter.
Calibration toolkits like OpenCV normally provide the calibration parameters as an intrinsic matrix and distortion coefficients. Omniverse includes native renderer support for the OpenCV pinhole and
OpenCV fisheye lens distortion models. Isaac Sim provides two standalone examples demonstrating the use of RtxCamera with OpenCV lens distortion models,
located at standalone_examples/api/isaacsim.sensors.experimental.rtx/camera_opencv_pinhole.py and standalone_examples/api/isaacsim.sensors.experimental.rtx/camera_opencv_fisheye.py.
Note
Previously, the
Cameraclass included APIs to approximate OpenCV pinhole and fisheye models distortion parameters by setting coefficients for thefisheyePolynomialdistortion model. Now that OpenCV lens distortion models are natively supported, those APIs have been deprecated.Omniverse RTX Camera Projection Attributes have been deprecated as of Isaac Sim 5.0, in favor of the
OmniLensDistortionschemata. The deprecated attributes are still visible in the UI in theFisheye Lenspanel when selecting a Camera prim, but will be ignored if you have set anOmniLensDistortionschema instead. Follow the instructions in “How To Add Schemata to Cameras” to see how to update Camera prim attributes for the new schemata in the UI.
Warning
In Isaac Sim 6.0, enabling arbitrary distortion models using a generalized projection model by
applying the OmniLensDistortionLutAPI schema to Camera prims does not correctly function, and if set,
the renderer will fallback to the default pinhole model. Instead, use the deprecated Omniverse RTX Camera
Projection Attributes referenced above to specify an arbitrary distortion model. This will be fixed in a future release.
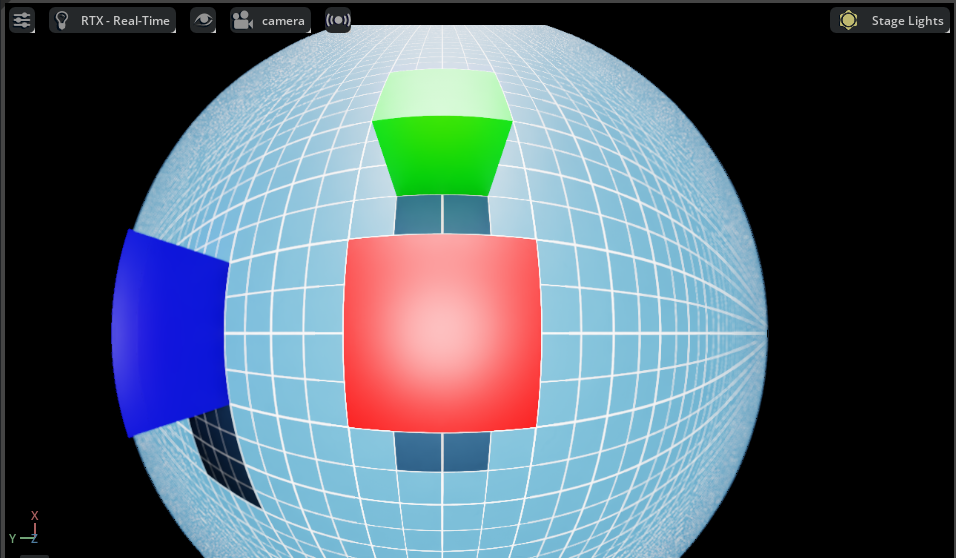
OpenCV Fisheye#
Run the standalone example to create an RtxCamera with the OmniLensDistortionOpenCvFisheyeAPI schema applied:
./python.sh standalone_examples/api/isaacsim.sensors.experimental.rtx/camera_opencv_fisheye.py
After running the example and setting the viewport to the newly-created camera, validate that you see an image like the one below.
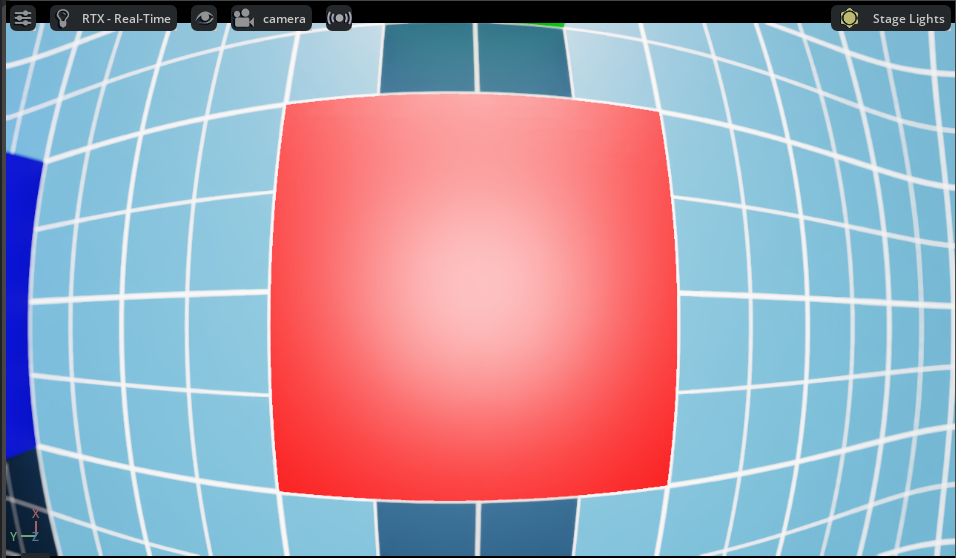
OpenCV Pinhole#
Run the standalone example to create an RtxCamera with the OmniLensDistortionOpenCvPinholeAPI schema applied:
./python.sh standalone_examples/api/isaacsim.sensors.experimental.rtx/camera_opencv_pinhole.py
After running the example and setting the viewport to the newly-created camera, you should see an image like the one below.
Extrinsic Calibration#
Extrinsic calibration parameters are normally provided by the calibration toolkits in a form of a transformation matrix. The convention between the axis and rotation order is important and it varies between the toolkits.
To set the extrinsic parameters for the individual camera sensor, use the following example to convert the transformation matrix from the calibration toolkit to the Isaac Sim units:
# Pseudocode -- adapt axis remapping and quaternion reordering to your calibration toolkit.
import numpy as np
from isaacsim.sensors.experimental.rtx import RtxCamera

dX, dY, dZ = _, _, _  # Extrinsics translation vector from the calibration toolkit
rW, rX, rY, rZ = _, _, _, _  # Note the order of the rotation parameters, it depends on the toolkit

RtxCamera(
    "/rig/camera_color",
    positions=np.array([-dZ, dX, dY]),  # Translation in the local frame of the prim
    orientations=np.array([rW, -rZ, rX, rY]),  # Quaternion orientation (wxyz) in the world/local frame
    # (depends if translations or positions is specified)
)
As an alternative, the camera sensor can be attached to a prim. In that case, the camera sensor will inherit the position and orientation from the prim.
from isaacsim.sensors.experimental.rtx import RtxCamera

# Create a camera prim with the OmniSensorAPI schema
cam = RtxCamera(
    "/World/camera",
    # translations = ...
    # orientations = ...
)
Exposing the ISP Camera Pipeline#
The omni.sensors.nv.camera extension simulates the camera sensor and Image Signal Processor (ISP) pipeline.
Isaac Sim includes a standalone example that configures the ISP pipeline via the OmniSensorGenericCameraCoreAPI USD schema and saves the introspection output from every pipeline stage as viewable images.
You can use these outputs to test your own ISP against images rendered in RTX, or compare them with the Omniverse-simulated ISP output.
Refer to the extension documentation for details on individual pipeline stages and schema attributes.
Note
The sample ISP program bundled with omni.sensors.nv.camera is only available on Linux x86_64.
Running the example on any other platform will print an informative message and exit early.
If you have your own ISP program for a different platform, update the _isp_program_path
variable in the script to point to it, and comment-out the platform check.
Run the example:
./python.sh standalone_examples/api/isaacsim.sensors.experimental.rtx/camera_isp_pipeline.py
The example renders 20 frames and saves output from each ISP stage to the camera_isp_pipeline_outputs directory.
The pipeline stages, in order, are described below.
HDR texture read — the raw HDR radiance buffer read from the renderer before any sensor processing.

Color correction — applies black-level subtraction, white-balance gains, a 3x3 color-correction matrix, and sensor-response scaling.

CFA encoding — encodes the RGB image into a single-channel Bayer mosaic using the configured Color Filter Array pattern (GRBG in this example).
Noise simulation — adds Gaussian and shot noise to the Bayer image to approximate real sensor behavior.
Companding — applies a piecewise-linear tone curve that compresses the high-dynamic-range Bayer data into a lower bit depth.
ISP output — the fully processed image after the on-chip ISP program runs (demosaic, denoise, tone-map, and color grading).

YUV conversion — the final ISP output converted from RGB to YUV color space.

Camera Sensor Rigs#
The camera sensor rig is a collection of camera sensors that are attached to a single prim. It can be assembled from the individual sensors, that are either created manually or derived from the calibration parameters.
This will be a short discussion on how we created a digital twin of the RealSense™ Depth Camera D455. The USD for the camera can be found in the content folder as: /Isaac/Sensors/RealSense/D455/rsd455.usd.
There are three visual sensors, and one IMU sensor on the RealSense. Their placement relative to the camera origin was taken from the layout diagram in the TechSpec document from Intel’s web site.
Most camera parameters were also found in the TechSpec, for example, the USD parameter fStop is the denominator of the F Number from the TechSpec; the focalLength is the Focal Length, and the ftheatMaxFov
is the Diagonal Field of View. However, some parameters, like the focusDistance were estimated by comparing real output and informed guesses.
The horizontalAperture and verticalAperture in that example are derived from the technical specification. From the TechSpec, the left, right, and color sensors are listed as a OmniVision Technologies OV9782, and
the Tech Spec for that sensor lists the image area as 3896 x 2453 µm. We used that as the aperture sizes.
The resolution for the depth and color cameras are 1280 x 800, but it’s up to you to attach a render product of that size to the outputs.
The Pseudo Depth camera is a stand in for the depth image created by the camera’s firmware. We don’t attempt to copy the algorithms that create the image from stereo, but the Camera_Pseudo_Depth component
is a convenience camera that can return the scene depth as seen from that camera position between the left and right stereo cameras. It would be more accurate to create a depth image from stereo, and if
the same algorithm that is used in the RealSense was used then the same results (including artifacts) would be produced.
Camera Inspector Extension#
The Camera Inspector Extension allows you to:
Create multiple viewports for each camera
Check camera coverage
Get and set camera poses in the desired frames
Launching Extension#
To open the Camera Inspector extension:
Go to the Menu Bar.
Select Tools > Sensors > Camera Inspector.
After launching the extension, verify that you can see your camera in the dropdown.
When adding a new camera, you must click the Refresh button to ensure that the extension finds this new camera.
Select the camera you want to inspect.
Camera State Textbox#

The Camera State textbox near the top of the extension provides a convenient way to copy the position and orientation of your camera directly into code. Click the copy icon on the right of the textbox to copy to your clipboard.
Creating a Viewport#
With the camera selected, you can create a new viewport for your camera.
Click on the Create Viewport button to the right of the camera dropdown menu.
By default, this creates a new viewport and assigns the current selected Camera to it.
Assign different cameras to different viewports using the two dropdown menus and buttons in the extension:

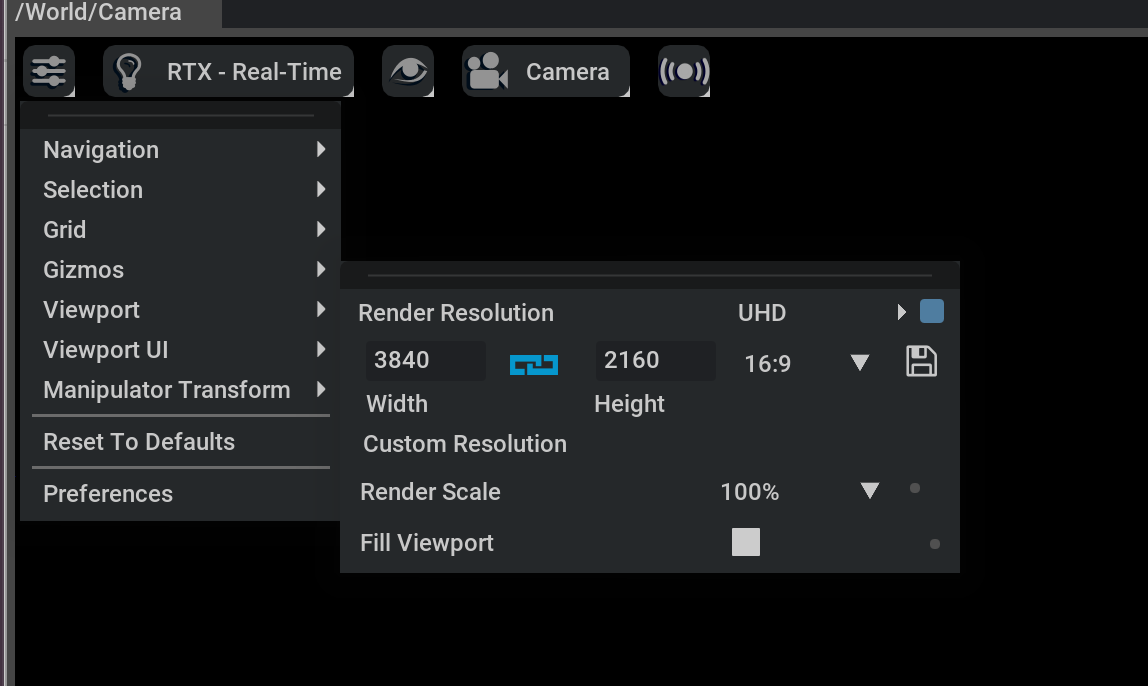
After launching your viewport, you can change the resolution using the menu in the top left and going to Viewport.
Note
When changing the resolution, Omniverse Kit only supports square pixels. This means that the resolution aspect ratio must be the same as the aperture ratio.
Standalone Examples#
For end-to-end examples of creating and collecting data from camera sensors, refer to the following.
Basic Creation and Visualization
# Basic camera creation with rgb + distance_to_image_plane annotators in a warehouse scene
./python.sh standalone_examples/api/isaacsim.sensors.experimental.rtx/create_camera_basic.py
Specialized Cameras
# Single-view stereoscopic depth sensor
./python.sh standalone_examples/api/isaacsim.sensors.experimental.rtx/create_camera_depth_sensor.py
./python.sh standalone_examples/api/isaacsim.sensors.experimental.rtx/camera_stereoscopic_depth.py

# Structured light camera
./python.sh standalone_examples/api/isaacsim.sensors.experimental.rtx/camera_structured_light.py
Batched / Tiled
# TiledCameraSensor for multi-camera batched rendering
./python.sh standalone_examples/api/isaacsim.sensors.experimental.rtx/camera_tiled.py
Calibration
# OpenCV pinhole and fisheye lens distortion models on RtxCamera
./python.sh standalone_examples/api/isaacsim.sensors.experimental.rtx/camera_opencv_pinhole.py
./python.sh standalone_examples/api/isaacsim.sensors.experimental.rtx/camera_opencv_fisheye.py
Annotator Device Selection
# CPU vs CUDA-resident annotator buffers
./python.sh standalone_examples/api/isaacsim.sensors.experimental.rtx/camera_annotator_devices.py
ISP Pipeline
# Per-stage ISP pipeline introspection (Linux x86_64 only)
./python.sh standalone_examples/api/isaacsim.sensors.experimental.rtx/camera_isp_pipeline.py
ROS 2 Integration
# Publish camera frames over ROS 2
./python.sh standalone_examples/api/isaacsim.sensors.experimental.rtx/camera_ros.py