URDF Import: Turtlebot#
NVIDIA Isaac Sim has several tools to facilitate integration with ROS systems. There is the ROS 2 bridge, a method to import URDF, and much more. This tutorial series gives examples of how to use these tools.
Learning Objectives#
In this example, you set up a Turtlebot3 in Isaac Sim and enable it to drive around.
If you already have a robot with rigged joints and properties in USD format, and you want to jump straight into using our ROS 2 bridge, go to the next tutorial in the series Driving TurtleBot using ROS 2 Messages.
Getting Started#
Prerequisite
Completed ROS 2 Installation (Default) so that ROS 2 is available, the ROS 2 extension is enabled, and necessary environment variables are set.
Basic understanding of ROS workspaces.
Install xacro using the following command:
sudo apt install ros-$ROS_DISTRO-xacro
pixi add ros-$ROS_DISTRO-xacro
Importing TurtleBot URDF#
In a ROS-source terminal, clone the Turtlebot3’s description package if you haven’t done so already.
git clone -b $ROS_DISTRO https://github.com/ROBOTIS-GIT/turtlebot3.git turtlebot3
Locate the URDF file for Turtlebot3 Burger in
turtlebot3/turtlebot3_description/urdf/turtlebot3_burger.urdfand navigate to that directory.cd turtlebot3/turtlebot3_description/urdf
In the same terminal, pre-process the URDF file to manually remove the namespace argument values and save to the
tb3_burger_processed.urdffile:namespace="" xacro ./turtlebot3_burger.urdf "namespace:=${namespace:+$namespace/}" > tb3_burger_processed.urdf
The ROS 2 Installation (Other Platforms) instructions prescribe Command Prompt. Use the matching tab below for the shell you launched
pixi shellfrom:xacro .\turtlebot3_burger.urdf "namespace:=" > tb3_burger_processed.urdf
In PowerShell, the
>redirect operator writes UTF-16 LE, which the URDF importer cannot parse. Pipe throughOut-File -Encoding utf8so the file is written as UTF-8:xacro .\turtlebot3_burger.urdf "namespace:=" | Out-File -Encoding utf8 tb3_burger_processed.urdf
Click File > Import, then locate the URDF file and select it.
Select the Base Type as “Mobile” to indicate that the robot has a moveable base
Optionally, set Robot Type Wheeled to denote that the robot is a wheeled robot on the robot schema.
Verify that the configuration of the robot matches the following:
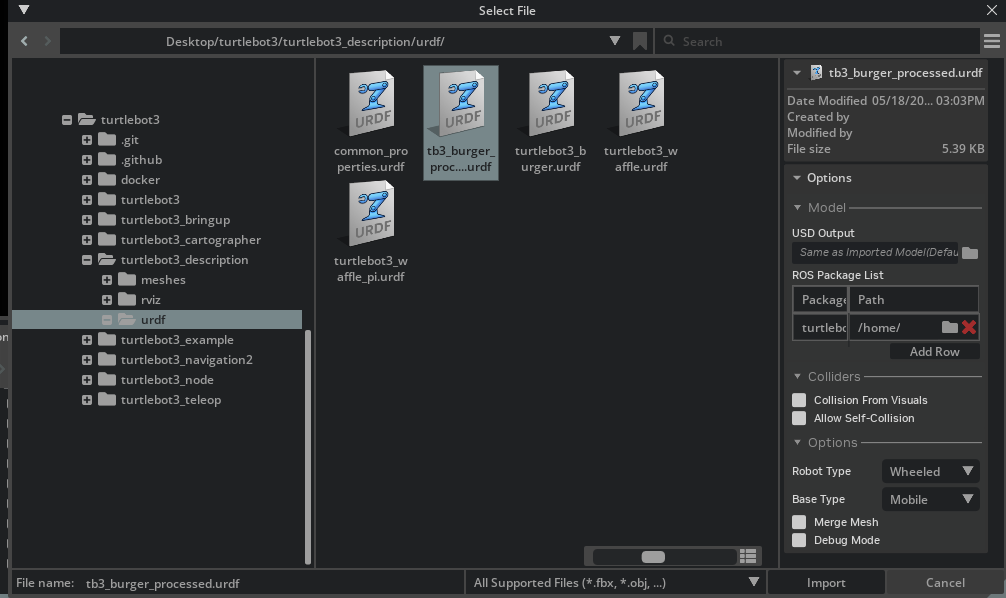
Click Import, the URDF importer will automatically open this file
Tune the Robot#
Importing the URDF automatically imports material, physical, and joint properties whenever it is available and has matching categories in NVIDIA Isaac Sim. However, when there are no available or matching categories, or if the units are different between the two systems, what gets automatically filled in might not be accurate and changes the robot’s behavior. Here are some properties that can be tuned to correct the robot’s behavior.
Frictional Properties
If your robot’s wheels are slipping, try changing the friction coefficients of the wheels and potentially the ground as well following steps in Tutorial 2: Assemble a Simple Robot.
Physical Properties
If no explicit mass or inertial properties are given, the physics engine will estimate them from the geometry mesh. To update the mass and inertial properties, find the prim that contains the rigid body for the given link. You can verify this by finding Physics > Rigid Body under its property tab. If it already has a “Mass” category under its Physics property tab, modify them accordingly. If there isn’t already a “Mass” category, you can add it by clicking on the +Add button on top of the Property tab, and select Physics > Mass.
Joint Properties
If your robot is oscillating at the joint or moving too slow, take a look at the stiffness and damping parameters for the joints. High stiffness makes the joints snap faster and harder to the desired target, and higher damping smooths but also slows down the joint’s movement to target. For pure position drives, set relatively high stiffness and low damping. For velocity drives, stiffness must be set to zero with a non-zero damping.
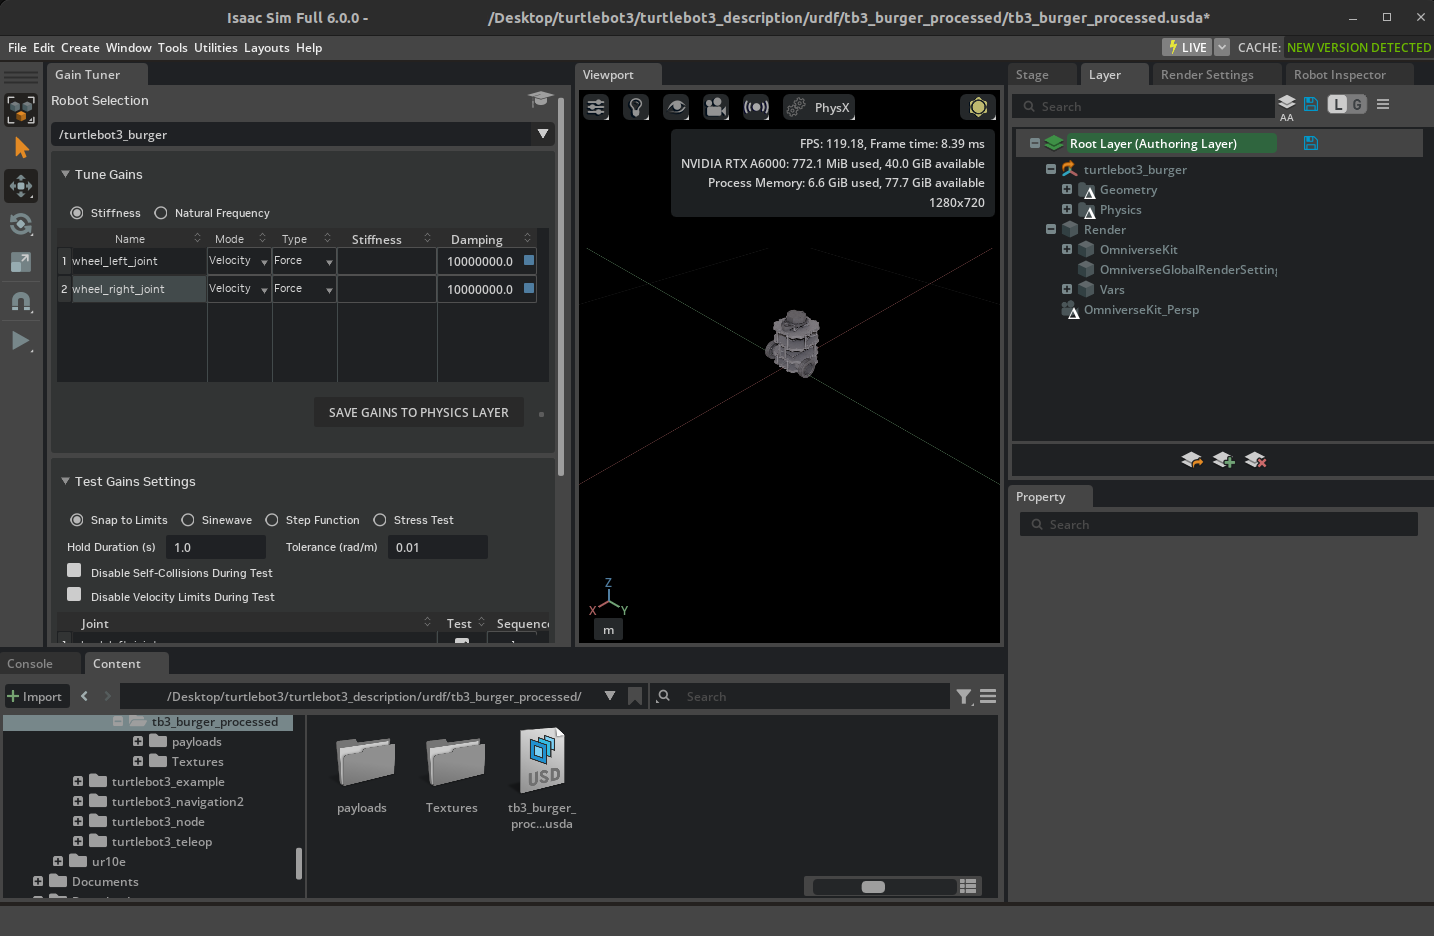
Go to Tools > Robotics > Asset Editors > Gain Tuner.
Select the robot in the stage tree.
Set the Damping to a value of
10000000.0for the wheel_left_joint and wheel_right_joint.Click the Save Gains to Physics Layer button to save the gains to the physics layer.
Assemble the scenes#
Note
On multi-GPU systems running Windows, loading and playing this scene may currently result in a fatal application crash. This is a known issue and will be addressed in a future release.
For the purpose of this tutorial series, use an Isaac environment, later you can import the robot into any environment of your choosing. Open the environment by going to the Isaac Sim Content browser and clicking Isaac Sim/Environments/Simple_Room/simple_room.usd. If you do not want to use the provided environment, make sure there is a GroundPlane and a PhysicsScene to your environment. Both can be found in Create > Physics. You might also need some lighting, play with the various types of lighting in Create > Light to get the desired effect.
On a new stage, drag the
simple_room.usdonto the stage, and place it at the origin by zeroing out all the Translate components in the Transform Property. You may need to zoom in a bit to observe the table inside the roomNow add the turtle bot to the stage by dragging the turtlebot robot asset file onto the stage.
When the Turtlebot is first imported, it will be on the table. Place it just above the floor of the room using the gizmo. The transform used in the screenshot is
(0, 1.5, -0.75).Press Play and you validate that you observe the Turtlebot fall onto the floor.

Summary#
This tutorial covered the following topics:
URDF import
Tuning the robot parameters
Next Steps#
Continue on to the next tutorial in our ROS Tutorials series, Driving TurtleBot using ROS 2 Messages, to learn how to add OmniGraph nodes to move the robot, and ROS 2 bridge nodes to connect to the ROS network.
Further Learning#
More details URDF Importer Extension.
More details on world building Tutorial 3: Articulate a Basic Robot.
More details about Gain Tuner Extension and Physics Inspector.