Container Installation#
The container installation of Isaac Sim is recommended for deployment on remote headless servers or the Cloud using a Docker container running Linux.
Container Setup#
Ensure your system meets the System Requirements for running NVIDIA Isaac Sim.
Install Docker:
# Docker installation using the convenience script
curl -fsSL https://get.docker.com -o get-docker.sh
sudo sh get-docker.sh

# Post-install steps for Docker
sudo groupadd docker
sudo usermod -aG docker $USER
newgrp docker

# Verify Docker
docker run hello-world
Install the NVIDIA Container Toolkit:
# Configure the repository
curl -fsSL https://nvidia.github.io/libnvidia-container/gpgkey | sudo gpg --dearmor -o /usr/share/keyrings/nvidia-container-toolkit-keyring.gpg \
    && curl -s -L https://nvidia.github.io/libnvidia-container/stable/deb/nvidia-container-toolkit.list | \
    sed 's#deb https://#deb [signed-by=/usr/share/keyrings/nvidia-container-toolkit-keyring.gpg] https://#g' | \
    sudo tee /etc/apt/sources.list.d/nvidia-container-toolkit.list \
    && \
    sudo apt-get update

# Install the NVIDIA Container Toolkit packages
sudo apt-get install -y nvidia-container-toolkit
sudo systemctl restart docker

# Configure the container runtime
sudo nvidia-ctk runtime configure --runtime=docker
sudo systemctl restart docker

# Verify NVIDIA Container Toolkit
docker run --rm --runtime=nvidia --gpus all nvcr.io/nvidia/cuda:12.8.0-base-ubuntu24.04 nvidia-smi
Note
Install the latest version of NVIDIA Container Toolkit to get security fixes.
The validation step uses the NGC-hosted CUDA base image (
nvcr.io/nvidia/cuda), which is public and avoids Docker Hub’s anonymous pull rate limits (HTTP429 Too Many Requests). The image is multi-arch, so the same tag runs on Linux x86_64 and aarch64.If a step that pulls from Docker Hub (for example
docker run hello-world) fails with429 Too Many Requests, rundocker loginfirst or retry later, since Docker Hub enforces rate limits on anonymous pulls.
Container Deployment#
This section describes how to run the NVIDIA Isaac Sim container in headless mode with livestreaming.
Steps:
Setup and install the container prerequisites. See Container Setup above.
Run the following command to confirm your GPU driver version:
nvidia-smi
Pull the Isaac Sim Container:
docker pull nvcr.io/nvidia/isaac-sim:6.0.0
Create the cached volume mounts on host. Each directory maps to a container volume mount in the
docker runcommand below:
mkdir -p ~/docker/isaac-sim/cache/main
mkdir -p ~/docker/isaac-sim/cache/computecache
mkdir -p ~/docker/isaac-sim/config
mkdir -p ~/docker/isaac-sim/data
mkdir -p ~/docker/isaac-sim/logs
mkdir -p ~/docker/isaac-sim/pkg
mkdir -p ~/.cache/ov/hub
sudo chown -R 1234:1234 ~/docker/isaac-sim ~/.cache/ov/hub
Run the Isaac Sim container with an interactive Bash session:
docker run --name isaac-sim --entrypoint bash -it --gpus all -e "ACCEPT_EULA=Y" --rm --network=host \
    -e "PRIVACY_CONSENT=Y" \
    -v ~/docker/isaac-sim/cache/main:/isaac-sim/.cache:rw \
    -v ~/docker/isaac-sim/cache/computecache:/isaac-sim/.nv/ComputeCache:rw \
    -v ~/docker/isaac-sim/logs:/isaac-sim/.nvidia-omniverse/logs:rw \
    -v ~/docker/isaac-sim/config:/isaac-sim/.nvidia-omniverse/config:rw \
    -v ~/docker/isaac-sim/data:/isaac-sim/.local/share/ov/data:rw \
    -v ~/docker/isaac-sim/pkg:/isaac-sim/.local/share/ov/pkg:rw \
    -v ~/.cache/ov/hub:/var/cache/hub:rw \
    -u 1234:1234 \
    nvcr.io/nvidia/isaac-sim:6.0.0
Important
--network=host is required for WebRTC livestreaming. The NVIDIA streaming SDK binds its UDP media
socket to the ISAACSIM_HOST address, which must be a real network interface inside the container.
Docker bridge networking (-p port publishing) does not work because the host IP is not available
inside the container’s network namespace — signaling may connect, but the video stream will not.
Note
The Isaac Sim container now runs as a rootless user.
The Isaac Sim container now supports multi-arch. The same tag can be run on Linux x86_64 and aarch64 systems.
By using the
-e "ACCEPT_EULA=Y"flag, you accept the license agreement of the image found at NVIDIA Omniverse License Agreement.By using the
-e "PRIVACY_CONSENT=Y"flag, you opt-in to the data collection agreement found at Data Collection & Usage. You may opt-out by not setting this flag.The
-e "PRIVACY_USERID=<email>"flag can optionally be set for tagging the session logs.Add the
--runtime=nvidiaflag if there are issues detecting the GPU in the container.For enterprise users, see Enterprise Nucleus Server.
The Isaac Sim container uses assets in the Cloud if no Nucleus server is available.
When using a separate Nucleus server:
See Problem Connecting to Docker Container to expose all ports of the container and connect to an external Nucleus server.
See Setting the Default Nucleus Server to set the default Nucleus server.
See Setting the Default Username and Password for Connecting to the Nucleus Server to set the default credentials for any Nucleus server.
Environment Variables
The following environment variables can be passed to docker run with -e to control container behavior:
Variable |
Required |
Description |
|---|---|---|
|
Yes |
Accept the license agreement (set to |
|
No |
Opt-in to data collection (set to |
|
No |
Tag telemetry data with a user ID (for example an email address). See Data Collection & Usage. |
|
No |
Override the default asset root (passed as |
|
No |
Public or private IP of the host for livestream. Default: |
|
No |
WebRTC signaling port. Default: |
|
No |
WebRTC media streaming port. Default: |
Check if your system is compatible with Isaac Sim:
./isaac-sim.compatibility_check.sh --/app/quitAfter=10 --no-window
Note
To run the Compatibility Checker separately:
docker run --entrypoint bash -it --gpus all --rm --network=host \
    nvcr.io/nvidia/isaac-sim:6.0.0 ./isaac-sim.compatibility_check.sh --/app/quitAfter=10 --no-window
You should see the text “System checking result: PASSED” if your system is compaitble.
Start Isaac Sim with native livestream mode:
./runheadless.sh -v
Streaming Ports
If the host firewall is active (e.g. UFW), allow the following ports:
Port |
Protocol |
Purpose |
|---|---|---|
|
TCP |
Web viewer (Docker Compose only) |
|
TCP |
WebRTC signaling |
|
UDP |
WebRTC media stream |
If you override ports via ISAACSIM_SIGNAL_PORT, ISAACSIM_STREAM_PORT, or WEB_VIEWER_PORT, open those ports instead.
Note
- Before running a livestream client, you must have the Isaac Sim app loaded and ready.
It may take a few minutes for Isaac Sim to completely load.
The -v flag is used to show additional logs while the shader cache is being warmed up.
To confirm this, look out for this line in the console or the logs:
Isaac Sim Full Streaming App is loaded.
The first time loading Isaac Sim, it takes a while for the shaders to be cached. Subsequent runs of Isaac Sim are quicker because the shaders are cached and the cache is mounted when the container runs.
See Save Isaac Sim Configs on Local Disk to make Isaac Sim configs and cache persistent when using containers.
Connect the native Isaac Sim WebRTC Streaming Client to view Isaac Sim. Download it from the Latest Release section, enter the IP address of the host, and click Connect.
Alternatively, if you prefer a browser-based viewer with no client installation, use the Docker Compose deployment below instead of the manual
docker runworkflow above.Proceed to Quick Tutorials to begin your first tutorial.
Note
Some tutorials that use the Content Browser may not work when using the Isaac Sim container with no Nucleus connected.
It is recommended to use the Workstation Isaac Sim from the Omniverse Launcher to run all tutorials.
The Isaac Sim container supports running our Python apps and standalone examples in headless mode only.
The latest NVIDIA drivers may not be fully supported for some features like livestreaming. See Technical Requirements for recommended drivers.
See also Isaac Sim Dockerfiles to build your own custom Isaac Sim container.
You can debug Python Scripts Running in Docker.
Stale volume mounts: Old cached data in Docker volume mount directories can cause crashes, config errors, or livestream failures. Remove the existing mounts and recreate them:
sudo rm -rf ~/docker/isaac-sim
mkdir -p ~/docker/isaac-sim/cache/main
mkdir -p ~/docker/isaac-sim/cache/computecache
mkdir -p ~/docker/isaac-sim/config
mkdir -p ~/docker/isaac-sim/data
mkdir -p ~/docker/isaac-sim/logs
mkdir -p ~/docker/isaac-sim/pkg
mkdir -p ~/.cache/ov/hub
sudo chown -R 1234:1234 ~/docker/isaac-sim ~/.cache/ov/hub
Second browser cannot connect: Only one browser tab or window can be connected to Isaac Sim at a time. Close the existing browser session before opening a new one.
Clipboard not working in web viewer: The browser Clipboard API requires a secure context. When accessing the web viewer over HTTP from a non-localhost address, clipboard forwarding is blocked. In Chrome, open
chrome://flags/#unsafely-treat-insecure-origin-as-secure, add the web viewer URL (e.g.http://192.168.1.100:8210), and relaunch the browser.
Tip
To build a Docker image from source instead of pulling from NGC, see the Docker Build Tools README. The README also covers multi-instance deployment with dedicated GPUs, cloud VM configuration (AWS, GCP, Azure), and advanced Docker options.
Hub Workstation Cache#
Hub Workstation Cache is a service that speeds up USD workflows by caching storage-derived data locally. When running Isaac Sim in a container, Hub should also run as a container on the same host so that all Kit-based clients can benefit from the shared cache.
Note
Hub Workstation Cache is designed for local workstation use only — for example, bare-metal runs or containers on a local workstation. It is not intended for multi-user servers or cloud deployments. For distributed or cloud caching, see Derived Data Cache Service (DDCS).
The Hub Workstation Cache image is public and can be pulled without logging in to nvcr.io. If your Docker client
is already logged in to nvcr.io, NGC checks whether the governing terms have been accepted for your NGC
organization before allowing the pull.
Before pulling the Hub image with Docker credentials, open the Hub Workstation Cache Container page in a browser,
sign in to NGC, select version 2.0.0, and accept the governing terms. NGC requires terms acceptance once per
NGC organization. For the official NGC procedure, see NGC Accepting Terms Before Downloading.
If Docker reports DENIED with Please accept license on the browser to be able to download, either accept the
terms in the browser for the same NGC organization used by docker login nvcr.io, or log out of nvcr.io before
pulling this public image anonymously:
$ docker logout nvcr.io
$ docker pull nvcr.io/nvidia/omniverse/hub_workstation_cache:2.0.0
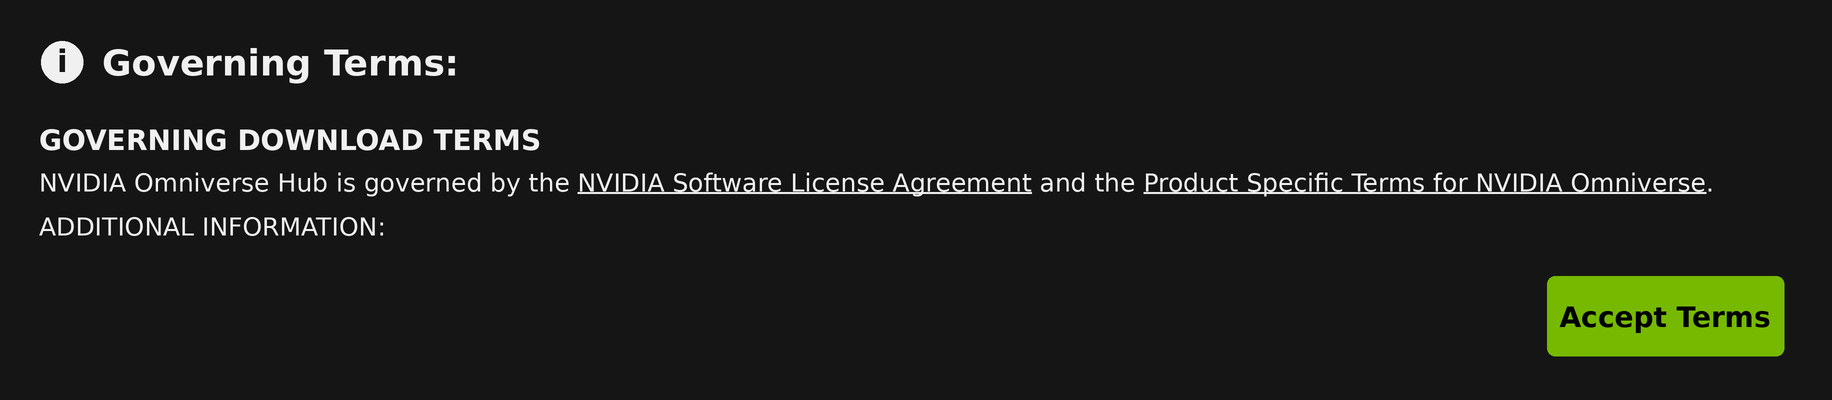
Accept the NGC governing terms for the Hub Workstation Cache image before pulling with Docker credentials.#
Start the Hub container before launching Isaac Sim:
mkdir -p ~/.cache/ov/hub
sudo chown -R 1234:1234 ~/.cache/ov/hub
docker run --name hub-cache --rm -d --network=host \
    -v ~/.cache/ov/hub:/var/cache/hub:rw \
    -u 1234:1234 \
    nvcr.io/nvidia/omniverse/hub_workstation_cache:2.0.0
Once the container is running, the Hub settings UI is available at http://localhost:14090/index.html.
The Isaac Sim container is pre-configured to discover Hub at runtime via the following environment variables baked into the image:
Variable |
Value |
Purpose |
|---|---|---|
|
|
Tells the local Hub executable where to find the cache |
|
|
Prevents the client from starting its own Hub instance |
|
|
Path to the Hub executable used for client coordination |
The ~/.cache/ov/hub:/var/cache/hub volume mount in the Isaac Sim docker run examples maps the same
host directory into both containers so they share the cache. --network=host is required so the Hub client
inside Isaac Sim can reach the Hub service on localhost.
For more details, see the Hub as a Docker Container documentation.
Docker Compose Deployment (Isaac Sim + Web Viewer)#
Docker Compose can deploy Isaac Sim and a web-based WebRTC streaming client together. This is a simpler alternative to the manual docker run workflow above, and does not require downloading a native streaming client.
For full details on Docker Compose configuration, multi-instance deployment, and environment variables, see the Docker README.
The docker-compose.yml in tools/docker/ handles volume mounts, GPU assignment, networking, and health checks automatically. The web viewer is built from the NVIDIA Omniverse Web SDK.
Note
Docker Compose web viewer deployment is supported only on Ubuntu hosts and DGX Spark systems. Windows hosts, including WSL, are not supported.
Warning
Isaac Sim and the web viewer are designed for use on private/trusted networks. They do not include authentication or encryption. If you need to expose them over the Internet, add a reverse proxy with HTTPS/TLS and authentication (e.g. nginx with SSL certificates and basic auth). Users are responsible for securing any public-facing deployments.
Quick Start:
# Create cache/log mounts (use uid 1234 to match container user)
mkdir -p ~/docker/isaac-sim/{cache/main,cache/computecache,config,data,logs,pkg}
mkdir -p ~/.cache/ov/hub
sudo chown -R 1234:1234 ~/docker/isaac-sim ~/.cache/ov/hub

# Build the Isaac Sim image (one-time)
./tools/docker/prep_docker_build.sh --build --x86_64
./tools/docker/build_docker.sh --x86_64

# Launch both services
docker compose -p isim -f tools/docker/docker-compose.yml up --build -d

# Check the web viewer URL
docker compose -p isim logs web-viewer
Note
On DGX Spark, use --aarch64 instead of --x86_64 in the build commands above.
Open the URL shown in the logs (e.g. http://<host-ip>:8210) in a Chromium-based browser.
If Docker Compose reports a Hub startup or connectivity issue after a previous test, restart the Hub container from Hub Workstation Cache and retry Docker Compose.
To use a prebuilt NGC image instead of building locally:
ISAAC_SIM_IMAGE=nvcr.io/nvidia/isaac-sim:6.0.0 docker compose -p isim -f tools/docker/docker-compose.yml up --build -d
To stop:
docker compose -p isim -f tools/docker/docker-compose.yml down
Note
The web viewer bakes the signaling host and ports at build time. Use
--buildwhen changingISAACSIM_HOSTor port variables.If Docker startup fails after an interrupted build, failed extraction, or disk-full event, clean the generated Docker build context and rebuild from a known-good build output. See the Docker README troubleshooting section for recovery steps.
Docker Compose supports multi-instance deployment with dedicated GPUs, custom signal/stream ports, and more. See the Docker README for full configuration details.
Container Deployment with GUI#
This section describes how to run the NVIDIA Isaac Sim container with GUI.
Steps:
Setup and install the container prerequisites. See Container Setup above.
Run the following command to confirm your GPU driver version:
nvidia-smi
Pull the Isaac Sim Container:
docker pull nvcr.io/nvidia/isaac-sim:6.0.0
Create the cached volume mounts on host. Each directory maps to a container volume mount in the
docker runcommand below:
mkdir -p ~/docker/isaac-sim/cache/main
mkdir -p ~/docker/isaac-sim/cache/computecache
mkdir -p ~/docker/isaac-sim/config
mkdir -p ~/docker/isaac-sim/data
mkdir -p ~/docker/isaac-sim/logs
mkdir -p ~/docker/isaac-sim/pkg
mkdir -p ~/.cache/ov/hub
sudo chown -R 1234:1234 ~/docker/isaac-sim ~/.cache/ov/hub
Run the Isaac Sim container with an interactive Bash session:
xhost +local:
docker run --name isaac-sim --entrypoint bash -it --gpus all -e "ACCEPT_EULA=Y" --rm --network=host \
    -e "PRIVACY_CONSENT=Y" \
    -v $HOME/.Xauthority:/isaac-sim/.Xauthority \
    -e DISPLAY \
    -v ~/docker/isaac-sim/cache/main:/isaac-sim/.cache:rw \
    -v ~/docker/isaac-sim/cache/computecache:/isaac-sim/.nv/ComputeCache:rw \
    -v ~/docker/isaac-sim/logs:/isaac-sim/.nvidia-omniverse/logs:rw \
    -v ~/docker/isaac-sim/config:/isaac-sim/.nvidia-omniverse/config:rw \
    -v ~/docker/isaac-sim/data:/isaac-sim/.local/share/ov/data:rw \
    -v ~/docker/isaac-sim/pkg:/isaac-sim/.local/share/ov/pkg:rw \
    -v ~/.cache/ov/hub:/var/cache/hub:rw \
    -u 1234:1234 \
    nvcr.io/nvidia/isaac-sim:6.0.0
Check if your system is compatible with Isaac Sim:
./isaac-sim.compatibility_check.sh
Start Isaac Sim with GUI:
./runapp.sh
Proceed to Quick Tutorials to begin your first tutorial.
Warning
Running Isaac Sim with GUI in the container is generally not recommended.
The application experience may not be as expected. For a full GUI app experience please run Isaac Sim with the Workstation Installation.