与可变形对象交互#
虽然可变形物体有时指的是一个更广泛的物体类别,如衣物、流体和软体,但在 PhysX 中,可变形物体在语法上对应于软体。与刚体不同,软体在外部力量和碰撞下可以变形。
软体通过 Finite Element Method (FEM) 在 PhysX 中进行仿真。软体由两个四面体网格组成 -- 一个仿真网格和一个碰撞网格。仿真网格用于仿真软体的变形,而碰撞网格用于检测与场景中其他物体的碰撞。有关更多细节,请查看 PhysX documentation 。
本教程展示了如何在仿真中与可变形对象进行交互。我们将生成一组软体立方体,并了解如何设置它们的节点位置和速度,以及如何对网格节点应用运动学命令以移动软体。
代码#
该教程对应于 run_deformable_object.py 脚本,在 scripts/tutorials/01_assets 目录中。
run_deformable_object.py 的代码
  1# Copyright (c) 2022-2026, The Isaac Lab Project Developers (https://github.com/isaac-sim/IsaacLab/blob/main/CONTRIBUTORS.md).
  2# All rights reserved.
  3#
  4# SPDX-License-Identifier: BSD-3-Clause
  5
  6"""
  7This script demonstrates how to work with the deformable object and interact with it.
  8
  9.. code-block:: bash
 10
 11    # Usage
 12    ./isaaclab.sh -p scripts/tutorials/01_assets/run_deformable_object.py
 13
 14"""
 15
 16"""Launch Isaac Sim Simulator first."""
 17
 18
 19import argparse
 20
 21from isaaclab.app import AppLauncher
 22
 23# add argparse arguments
 24parser = argparse.ArgumentParser(description="Tutorial on interacting with a deformable object.")
 25# append AppLauncher cli args
 26AppLauncher.add_app_launcher_args(parser)
 27# parse the arguments
 28args_cli = parser.parse_args()
 29
 30# launch omniverse app
 31app_launcher = AppLauncher(args_cli)
 32simulation_app = app_launcher.app
 33
 34"""Rest everything follows."""
 35
 36import torch
 37
 38import isaaclab.sim as sim_utils
 39import isaaclab.utils.math as math_utils
 40from isaaclab.assets import DeformableObject, DeformableObjectCfg
 41from isaaclab.sim import SimulationContext
 42
 43
 44def design_scene():
 45    """Designs the scene."""
 46    # Ground-plane
 47    cfg = sim_utils.GroundPlaneCfg()
 48    cfg.func("/World/defaultGroundPlane", cfg)
 49    # Lights
 50    cfg = sim_utils.DomeLightCfg(intensity=2000.0, color=(0.8, 0.8, 0.8))
 51    cfg.func("/World/Light", cfg)
 52
 53    # Create separate groups called "Origin1", "Origin2", "Origin3"
 54    # Each group will have a robot in it
 55    origins = [[0.25, 0.25, 0.0], [-0.25, 0.25, 0.0], [0.25, -0.25, 0.0], [-0.25, -0.25, 0.0]]
 56    for i, origin in enumerate(origins):
 57        sim_utils.create_prim(f"/World/Origin{i}", "Xform", translation=origin)
 58
 59    # Deformable Object
 60    cfg = DeformableObjectCfg(
 61        prim_path="/World/Origin.*/Cube",
 62        spawn=sim_utils.MeshCuboidCfg(
 63            size=(0.2, 0.2, 0.2),
 64            deformable_props=sim_utils.DeformableBodyPropertiesCfg(rest_offset=0.0, contact_offset=0.001),
 65            visual_material=sim_utils.PreviewSurfaceCfg(diffuse_color=(0.5, 0.1, 0.0)),
 66            physics_material=sim_utils.DeformableBodyMaterialCfg(poissons_ratio=0.4, youngs_modulus=1e5),
 67        ),
 68        init_state=DeformableObjectCfg.InitialStateCfg(pos=(0.0, 0.0, 1.0)),
 69        debug_vis=True,
 70    )
 71    cube_object = DeformableObject(cfg=cfg)
 72
 73    # return the scene information
 74    scene_entities = {"cube_object": cube_object}
 75    return scene_entities, origins
 76
 77
 78def run_simulator(sim: sim_utils.SimulationContext, entities: dict[str, DeformableObject], origins: torch.Tensor):
 79    """Runs the simulation loop."""
 80    # Extract scene entities
 81    # note: we only do this here for readability. In general, it is better to access the entities directly from
 82    #   the dictionary. This dictionary is replaced by the InteractiveScene class in the next tutorial.
 83    cube_object = entities["cube_object"]
 84    # Define simulation stepping
 85    sim_dt = sim.get_physics_dt()
 86    sim_time = 0.0
 87    count = 0
 88
 89    # Nodal kinematic targets of the deformable bodies
 90    nodal_kinematic_target = cube_object.data.nodal_kinematic_target.clone()
 91
 92    # Simulate physics
 93    while simulation_app.is_running():
 94        # reset
 95        if count % 250 == 0:
 96            # reset counters
 97            sim_time = 0.0
 98            count = 0
 99
100            # reset the nodal state of the object
101            nodal_state = cube_object.data.default_nodal_state_w.clone()
102            # apply random pose to the object
103            pos_w = torch.rand(cube_object.num_instances, 3, device=sim.device) * 0.1 + origins
104            quat_w = math_utils.random_orientation(cube_object.num_instances, device=sim.device)
105            nodal_state[..., :3] = cube_object.transform_nodal_pos(nodal_state[..., :3], pos_w, quat_w)
106
107            # write nodal state to simulation
108            cube_object.write_nodal_state_to_sim(nodal_state)
109
110            # Write the nodal state to the kinematic target and free all vertices
111            nodal_kinematic_target[..., :3] = nodal_state[..., :3]
112            nodal_kinematic_target[..., 3] = 1.0
113            cube_object.write_nodal_kinematic_target_to_sim(nodal_kinematic_target)
114
115            # reset buffers
116            cube_object.reset()
117
118            print("----------------------------------------")
119            print("[INFO]: Resetting object state...")
120
121        # update the kinematic target for cubes at index 0 and 3
122        # we slightly move the cube in the z-direction by picking the vertex at index 0
123        nodal_kinematic_target[[0, 3], 0, 2] += 0.001
124        # set vertex at index 0 to be kinematically constrained
125        # 0: constrained, 1: free
126        nodal_kinematic_target[[0, 3], 0, 3] = 0.0
127        # write kinematic target to simulation
128        cube_object.write_nodal_kinematic_target_to_sim(nodal_kinematic_target)
129
130        # write internal data to simulation
131        cube_object.write_data_to_sim()
132        # perform step
133        sim.step()
134        # update sim-time
135        sim_time += sim_dt
136        count += 1
137        # update buffers
138        cube_object.update(sim_dt)
139        # print the root position
140        if count % 50 == 0:
141            print(f"Root position (in world): {cube_object.data.root_pos_w[:, :3]}")
142
143
144def main():
145    """Main function."""
146    # Load kit helper
147    sim_cfg = sim_utils.SimulationCfg(device=args_cli.device)
148    sim = SimulationContext(sim_cfg)
149    # Set main camera
150    sim.set_camera_view(eye=[3.0, 0.0, 1.0], target=[0.0, 0.0, 0.5])
151    # Design scene
152    scene_entities, scene_origins = design_scene()
153    scene_origins = torch.tensor(scene_origins, device=sim.device)
154    # Play the simulator
155    sim.reset()
156    # Now we are ready!
157    print("[INFO]: Setup complete...")
158    # Run the simulator
159    run_simulator(sim, scene_entities, scene_origins)
160
161
162if __name__ == "__main__":
163    # run the main function
164    main()
165    # close sim app
166    simulation_app.close()
代码解释#
设计场景#
类似于 与刚性物体交互 教程,我们用一个地面平面和一个光源填充场景。此外,我们使用 assets.DeformableObject 类向场景中添加一个可变形对象。该类负责在输入路径处生成原始物体,并初始化它们相应的可变形物体物理句柄。
在本教程中,我们使用与 Spawn Objects 教程中的可变立方体类似的 spawn 配置来创建一个立方体软体对象。唯一的区别是我们现在将 spawn 配置包装到 assets.DeformableObjectCfg 类中。这个类包含有关资产的 spawn 策略和默认初始状态的信息。当这个类传递给 assets.DeformableObject 类时,它会在仿真播放时生成对象并初始化相应的物理句柄。
备注
可变形对象仅在 GPU 仿真中受支持,并且需要一个网格对象来生成,且该网格对象上必须具有可变形体物理属性。
如在刚体教程中所见,我们可以通过创建 assets.DeformableObject 类的实例,并将配置对象传递给其构造函数,以类似的方式将可变形对象生成到场景中。
    # Create separate groups called "Origin1", "Origin2", "Origin3"
    # Each group will have a robot in it
    origins = [[0.25, 0.25, 0.0], [-0.25, 0.25, 0.0], [0.25, -0.25, 0.0], [-0.25, -0.25, 0.0]]
    for i, origin in enumerate(origins):
        sim_utils.create_prim(f"/World/Origin{i}", "Xform", translation=origin)

    # Deformable Object
    cfg = DeformableObjectCfg(
        prim_path="/World/Origin.*/Cube",
        spawn=sim_utils.MeshCuboidCfg(
            size=(0.2, 0.2, 0.2),
            deformable_props=sim_utils.DeformableBodyPropertiesCfg(rest_offset=0.0, contact_offset=0.001),
            visual_material=sim_utils.PreviewSurfaceCfg(diffuse_color=(0.5, 0.1, 0.0)),
            physics_material=sim_utils.DeformableBodyMaterialCfg(poissons_ratio=0.4, youngs_modulus=1e5),
        ),
        init_state=DeformableObjectCfg.InitialStateCfg(pos=(0.0, 0.0, 1.0)),
        debug_vis=True,
    )
    cube_object = DeformableObject(cfg=cfg)
运行仿真循环#
继续刚体教程,我们在定期间隔内重置仿真,对可变形物体应用运动学命令,推进仿真,并更新可变形对象的内部缓冲区。
重置仿真状态#
与刚体和关节不同,可变形物体具有不同的状态表示。可变形物体的状态由网格的节点位置和速度定义。节点位置和速度定义在 simulation world frame 中,并存储在 assets.DeformableObject.data 属性中。
我们使用 assets.DeformableObject.data.default_nodal_state_w 属性来获取生成的对象 prims 的默认节点状态。这个默认状态可以通过 assets.DeformableObjectCfg.init_state 属性进行配置,在本教程中我们将其保持为身份。
注意
配置中的初始状态 assets.DeformableObjectCfg 指定了在生成时变形对象的姿态。根据这个初始状态,当仿真第一次播放时,会得到默认的节点状态。
我们对节点位置应用变换,以随机化可变形物体的初始状态。
            # reset the nodal state of the object
            nodal_state = cube_object.data.default_nodal_state_w.clone()
            # apply random pose to the object
            pos_w = torch.rand(cube_object.num_instances, 3, device=sim.device) * 0.1 + origins
            quat_w = math_utils.random_orientation(cube_object.num_instances, device=sim.device)
            nodal_state[..., :3] = cube_object.transform_nodal_pos(nodal_state[..., :3], pos_w, quat_w)
要重置可变形对象,我们首先通过调用 assets.DeformableObject.write_nodal_state_to_sim() 方法来设置节点状态。此方法将可变形对象原始的节点状态写入仿真缓冲区。此外,我们通过调用 assets.DeformableObject.write_nodal_kinematic_target_to_sim() 方法来释放在上一个仿真步骤中为节点设置的所有运动学目标。我们将在下一节中解释运动学目标。
最后,我们调用 assets.DeformableObject.reset() 方法来重置任何内部缓冲区和缓存。
            # write nodal state to simulation
            cube_object.write_nodal_state_to_sim(nodal_state)

            # Write the nodal state to the kinematic target and free all vertices
            nodal_kinematic_target[..., :3] = nodal_state[..., :3]
            nodal_kinematic_target[..., 3] = 1.0
            cube_object.write_nodal_kinematic_target_to_sim(nodal_kinematic_target)

            # reset buffers
            cube_object.reset()
逐步仿真#
可变形体支持用户驱动的运动学控制,其中用户可以为一些网格节点指定位置目标,而其余节点则通过 FEM 求解器进行仿真。这种 partial kinematic 控制对于用户希望以受控方式与可变形对象交互的应用程序非常有用。
在本教程中,我们将运动学命令应用于场景中的四个立方体中的两个。我们设置索引为 0(左下角)的节点的位置目标,使立方体沿 z 轴移动。
在每一步中,我们通过一个小值来增加节点的运动学位置目标。此外,我们设置标志以指示该目标是仿真缓冲区中该节点的运动学目标。这些设置通过调用 assets.DeformableObject.write_nodal_kinematic_target_to_sim() 方法来写入仿真缓冲区。
        # update the kinematic target for cubes at index 0 and 3
        # we slightly move the cube in the z-direction by picking the vertex at index 0
        nodal_kinematic_target[[0, 3], 0, 2] += 0.001
        # set vertex at index 0 to be kinematically constrained
        # 0: constrained, 1: free
        nodal_kinematic_target[[0, 3], 0, 3] = 0.0
        # write kinematic target to simulation
        cube_object.write_nodal_kinematic_target_to_sim(nodal_kinematic_target)
类似于刚体和关节,我们在进行仿真步进之前执行 assets.DeformableObject.write_data_to_sim() 方法。对于可变形对象,此方法不会对对象施加任何外部力。然而,我们保留此方法以便于完整性和未来扩展。
        # write internal data to simulation
        cube_object.write_data_to_sim()
更新状态#
在运行仿真后,我们更新可变对象 prims 的内部缓冲区,以反映它们在 assets.DeformableObject.data 属性中的新状态。这是通过 assets.DeformableObject.update() 方法完成的。
在固定的间隔下,我们将可变形物体的根位置打印到终端。如前所述,对于可变形物体来说,没有根状态的概念。然而,我们计算根位置的方法是所有网格节点的平均位置。
        # update buffers
        cube_object.update(sim_dt)
        # print the root position
        if count % 50 == 0:
            print(f"Root position (in world): {cube_object.data.root_pos_w[:, :3]}")
代码执行#
现在我们已经浏览了代码,接下来运行脚本并查看结果:
./isaaclab.sh -p scripts/tutorials/01_assets/run_deformable_object.py
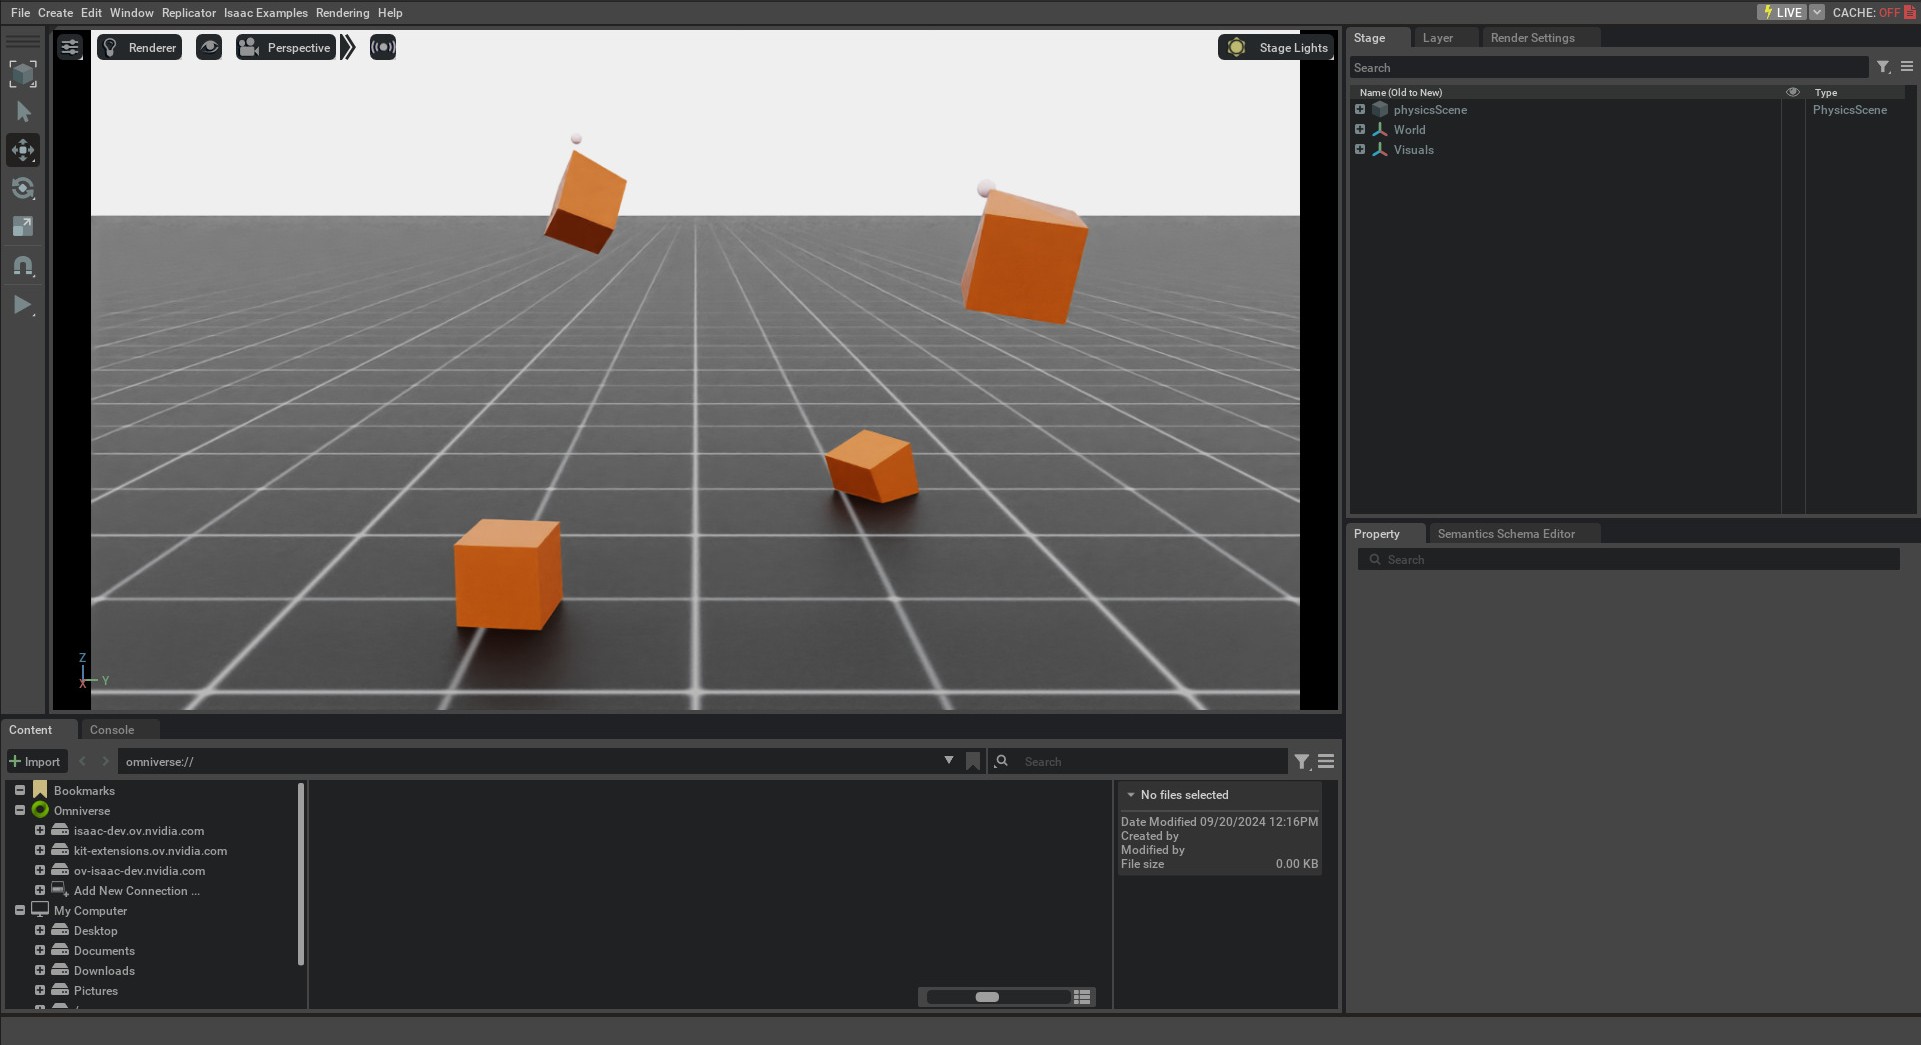
这应该会打开一个包含地面、灯光和几个绿色立方体的场景。其中两个立方体必须从高度上落下并落在地面上。同时,另外两个立方体必须沿 z 轴移动。你应该会看到一个标记,显示位于立方体左下角的节点的运动学目标位置。要停止仿真,你可以关闭窗口,或在终端中按 Ctrl+C 。
本教程展示了如何生成可变形物体并将它们包裹在一个 DeformableObject 类中,以初始化它们的物理处理器,从而允许设置和获取它们的状态。我们还看到了如何对可变形物体应用运动指令,以控制方式移动网格节点。在接下来的教程中,我们将看到如何使用 InteractiveScene 类创建场景。