Isaac Sim Basic Usage Tutorial#
This tutorial covers the basics of Isaac Sim, including navigating the GUI, adding objects to the stage, looking up basic properties of objects, and running simulations.
In this tutorial, you will go from a blank stage to a moving robot using your choice of three different workflows. The purpose of including the three different workflows is to illustrate that Isaac Sim can be used in different ways depending on your needs.
You can review the scripts in both workflows to see how they differ. Comparing and contrasting can help you understand how to perform the exact same tasks:
The extension script can be found in Window > Examples > Robotics Examples, then click on Open Script on the right upper corner of the browser.
The standalone script can be found in the
<isaac-sim-root-dir>/standalone_examples/tutorials/folder.
You can try the “hot-reloading” feature out by editing any of the scripts in the Extension examples. Save the file and see the changes reflected immediately without shutting down the simulator.
For a description of workflow concepts, see Workflows.
Tutorial#
There are three tabs for this tutorial, all three perform the same actions and reach the same outcome. Go through the full page under the same tab to learn about each workflow. Toggle between tabs to compare the different workflows or to perform the tutorial steps for your environment.
GUI
Extensions
Standalone Python
Launch
Launch Isaac Sim by running the App Selector from installation root folder.
cd ~/isaacsim
./isaac-sim.selector.sh
cd C:\isaacsim
isaac-sim.selector.bat
After the simulator is fully loaded, create a new scene:
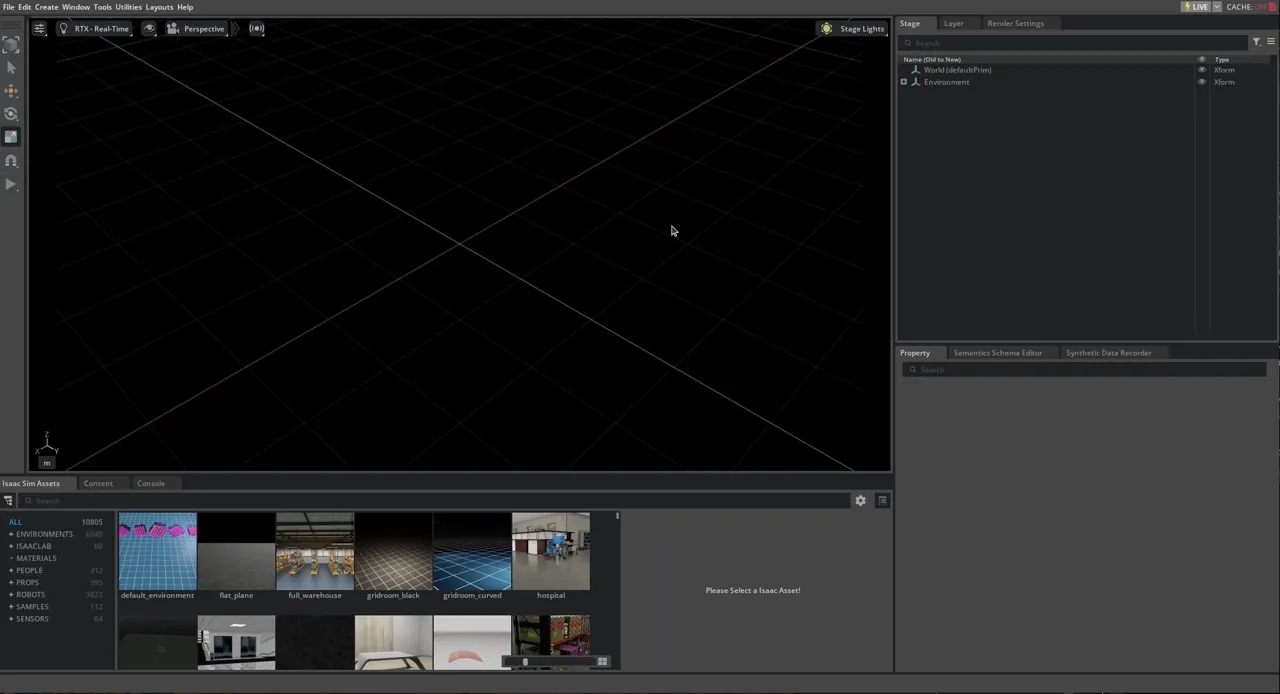
From the top Menu Bar, click File > New. The first time you launch Isaac Sim, it may take a five - ten minutes to complete.
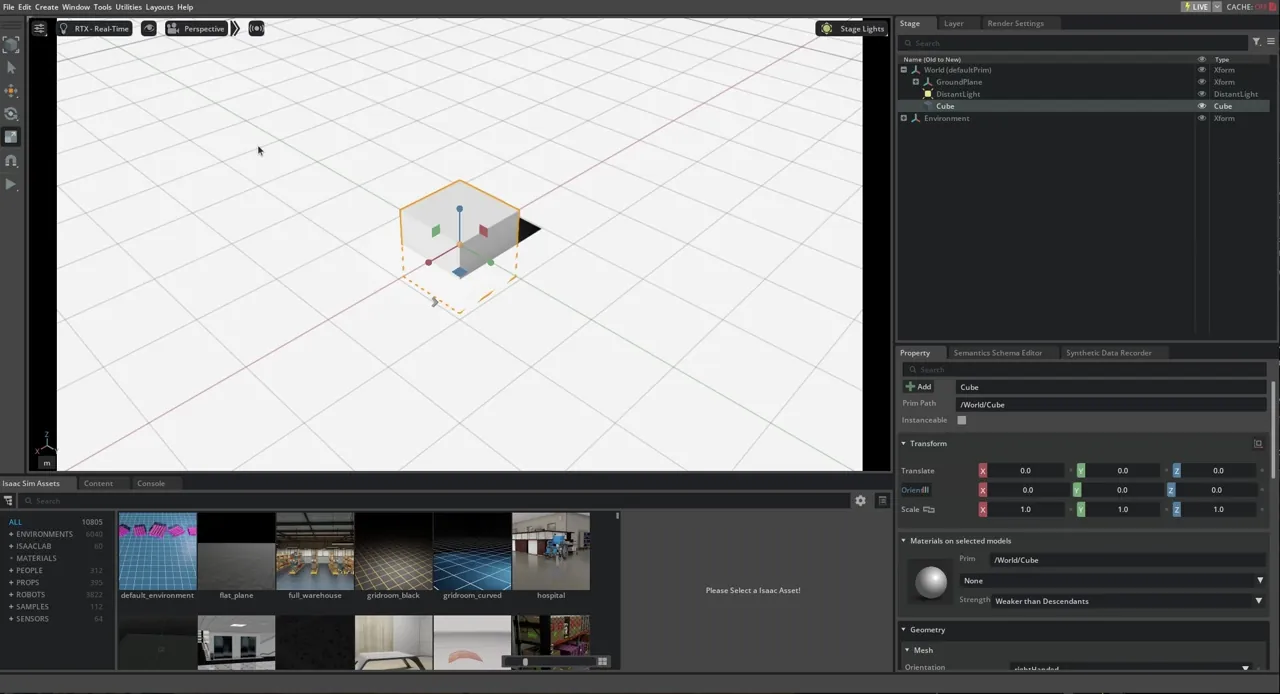
Add a Ground Plane
Add a ground plane to the scene:
From the top Menu Bar, click Create > Physics > Ground Plane.
Add a Light Source
You can add a light source to the scene to illuminate the objects in the scene. If you have a light source in the scene, but no object to reflect the light, the scene will still be dark.
Add a Distant Light source to the scene:
From the top Menu Bar, click Create > Lights > Distant Light.
Add a Visual Cube
A “visual” cube is a cube with no physics properties attached, for example, no mass, no collision. This cube will not fall under gravity or collide with other objects.
Add a cube to the scene:
From the top Menu Bar, click Create > Shape > Cube.
From the far left side of the UI locate the arrow icon and press Play. The cube does not do anything when simulation is running.
Move, Rotate, and Scale the Cube
Use the various gizmos on the left hand side toolbar to manipulate the cube.
Press “W” or click on the Move Gizmo to drag and move the cube. You can move it in only one axis by clicking on the arrows and drag, in two axes by clicking on the colored squares and drag, or in all three axes by clicking on the dot in the center of the gizmo and drag.
Press “E” or click on the Rotate Gizmo to rotate the cube.
Press “R” or click on the Scale Gizmo to scale the cube. You can scale it in one dimension by clicking on the the arrows and drag, two dimensions by clicking on the colored squares and drag, or in all three dimensions by clicking on the circle in the center of the gizmo and drag.
Press “esc” to deselect the cube.
For “Move” and “Rotate”, you can indicate if you are maneuvering in local or world coordinates. Click and hold on the gizmos to see the options.
You can make more precise modifications to the cube through its Property panel by typing in the exact numbers in the corresponding boxes. Click on the blue square next to the boxes to reset the values to default.
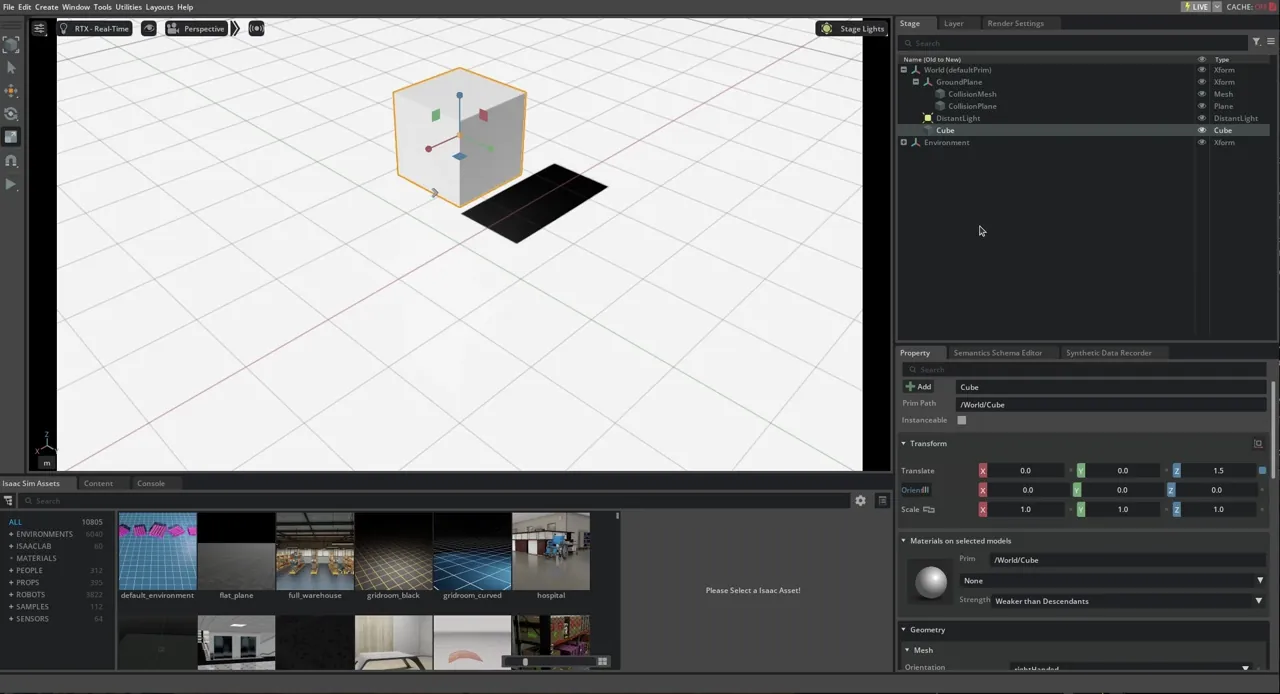
Add Physics and Collision Properties
Common physics properties are mass and inertia matrix, which are the properties that allow the object to fall under gravity. Collision Properties are the properties that allow the object to collide with other objects.
Physics and collision properties can be added separately, so you can have an object that collides with other objects but does not fall under gravity, or falls under gravity but does not collide with other objects. But in many cases, they are added together.
To add physics and collision properties to the cube:
Find the object (“/World/Cube”) on the stage tree and highlight it.
From the Property panel on the bottom right of the Workspace, click on the Add button and select Physics on the dropdown menu. This will show a list of properties that can be added to the object.
Select Rigid Body with Colliders Preset to add both physics and collision meshes to the object.
Press the Play button to see the cube fall under gravity and collide with the ground plane.
Launch
We will demonstrate the property of an Extension workflow using an existing Extension module called the “Script Editor”. The Script Editor allows the users to interact with the stage using Python. You will see that we will be mostly using the same Python APIs as in the Standalone Python workflow. The difference between the two workflows will become clear when we start to interact with the simulation timeline, especially in the next tutorial.
Launch a fresh instance of Isaac Sim, go the top Menu Bar and click Window > Script Editor.
Add a Ground Plane
To add a ground plane using the interactive Python, copy paste the following snippet in the Script Editor and run it by clicking the Run button on the bottom.
from isaacsim.core.api.objects.ground_plane import GroundPlane
GroundPlane(prim_path="/World/GroundPlane", z_position=0)
Add a Light Source
You can add a light source to the scene to illuminate the objects in the scene. If you have a light source in the scene, but no object to reflect the light, the scene will still be dark.
Open a new tab in the Script Editor (Tab > Add Tab).
Add a light source by copy-pasting the following snippet in the Script Editor and running it.
import omni.usd
from pxr import Sdf, UsdLux

stage = omni.usd.get_context().get_stage()
distantLight = UsdLux.DistantLight.Define(stage, Sdf.Path("/DistantLight"))
distantLight.CreateIntensityAttr(300)
Add a Visual Cube
A “visual” cube is a cube with no physics properties attached. No mass, no collision. This cube will not fall under gravity or collide with other objects. You can press Play to see that the cube does not do anything when the simulation is running.
Open a new tab in the Script Editor (Tab > Add Tab).
Add two cubes by copy-pasting the following snippet in the Script Editor and run it. We’ll keep one as visual-only, and add physics and collision properties to the other for comparison.
import numpy as np
from isaacsim.core.api.objects import VisualCuboid
VisualCuboid(
   prim_path="/visual_cube",
   name="visual_cube",
   position=np.array([0, 0.5, 0.5]),
   size=0.3,
   color=np.array([255, 255, 0]),
)
VisualCuboid(
   prim_path="/test_cube",
   name="test_cube",
   position=np.array([0, -0.5, 0.5]),
   size=0.3,
   color=np.array([0, 255, 255]),
)
Isaac Sim Core API are wrappers for raw USD and physics engine APIs. You can add a visual cube (without physics and color properties) using raw USD API. Notice that the raw USD API is more verbose, but gives you more control over each property.
from pxr import UsdPhysics, PhysxSchema, Gf, PhysicsSchemaTools, UsdGeom
import omni

# USD api for getting the stage
stage = omni.usd.get_context().get_stage()

# Adding a Cube
path = "/visual_cube_usd"
cubeGeom = UsdGeom.Cube.Define(stage, path)
cubePrim = stage.GetPrimAtPath(path)
size = 0.5
offset = Gf.Vec3f(1.5,-0.2,1.0)
cubeGeom.CreateSizeAttr(size)
if not cubePrim.HasAttribute("xformOp:translate"):
  UsdGeom.Xformable(cubePrim).AddTranslateOp().Set(offset)
else:
  cubePrim.GetAttribute("xformOp:translate").Set(offset)
Add Physics and Collision Properties
Common physics properties are mass and inertia matrix, which are the properties that allow the object to fall under gravity. Collision Properties are the properties that allow the object to collide with other objects.
Physics and collision properties can be added separately, so that you can have an object that collides with other objects but does not fall under gravity, or falls under gravity but does not collide with other objects. But in many cases, they are added together.
In Isaac Sim core API, we’ve written wrappers for frequently used objects with all its physics and collision properties attached. You can add a cube with physics and collision properties using the following snippet.
import numpy as np
from isaacsim.core.api.objects import DynamicCuboid

DynamicCuboid(
   prim_path="/dynamic_cube",
   name="dynamic_cube",
   position=np.array([0, -1.0, 1.0]),
   scale=np.array([0.6, 0.5, 0.2]),
   size=1.0,
   color=np.array([255, 0, 0]),
)
Alternatively, if you want to modify an existing object to have physics and collision properties, you can use the following snippet.
from isaacsim.core.prims import RigidPrim
RigidPrim("/test_cube")

from isaacsim.core.prims import GeometryPrim
prim = GeometryPrim("/test_cube")
prim.apply_collision_apis()
Click the Play button to see the cubes fall under gravity and collide with the ground plane.
Move, Rotate, and Scale the Cube
Moving an object using core API:
import numpy as np
from isaacsim.core.prims import XFormPrim


translate_offset = np.array([[1.5,1.2,1.0]])
orientation_offset = np.array([[0.7,0.7,0,1]])     # note this is in radians
scale = np.array([[1,1.5,0.2]])

stage = omni.usd.get_context().get_stage()
cube_in_coreapi = XFormPrim(prim_paths_expr="/test_cube")
cube_in_coreapi.set_world_poses(translate_offset, orientation_offset)
cube_in_coreapi.set_local_scales(scale)
Moving an object using raw USD API:
from pxr import UsdGeom, Gf
import omni.usd

stage = omni.usd.get_context().get_stage()
cube_prim = stage.GetPrimAtPath("/visual_cube_usd")
translate_offset = Gf.Vec3f(1.5,-0.2,1.0)
rotate_offset = Gf.Vec3f(90,-90,180)        # note this is in degrees
scale = Gf.Vec3f(1,1.5,0.2)
# translation
if not cube_prim.HasAttribute("xformOp:translate"):
   UsdGeom.Xformable(cube_prim).AddTranslateOp().Set(translate_offset)
else:
   cube_prim.GetAttribute("xformOp:translate").Set(translate_offset)
# rotation
if not cube_prim.HasAttribute("xformOp:rotateXYZ"):        # there are also "xformOp:orient" for quaternion rotation, as well as "xformOp:rotateX", "xformOp:rotateY", "xformOp:rotateZ" for individual axis rotation
   UsdGeom.Xformable(cube_prim).AddRotateXYZOp().Set(rotate_offset)
else:
   cube_prim.GetAttribute("xformOp:rotateXYZ").Set(rotate_offset)
# scale
if not cube_prim.HasAttribute("xformOp:scale"):
   UsdGeom.Xformable(cube_prim).AddScaleOp().Set(scale)
else:
   cube_prim.GetAttribute("xformOp:scale").Set(scale)
Launch
The script that runs Part I, Isaac Sim Basic Usage Tutorial, is located in standalone_examples/tutorials/getting_started.py.
To run the script, open a terminal, navigate to the root of the Isaac Sim installation, and run the following command:
./python.sh standalone_examples/tutorials/getting_started.py
python.bat standalone_examples\tutorials\getting_started.py
Code Explained
Add a Ground Plane
The lines inside getting_started.py that are relevant to adding a ground plane to the scene are below.
from isaacsim.core.api.objects.ground_plane import GroundPlane
GroundPlane(prim_path="/World/GroundPlane", z_position=0)
Add a Light Source
You can add a light source to the scene to illuminate the objects in the scene. If you have a light source in the scene, but no object to reflect the light, the scene will still be dark.
The lines inside getting_started.py that add a Distant Light are:
from pxr import Sdf, UsdLux
stage = omni.usd.get_context().get_stage()
distantLight = UsdLux.DistantLight.Define(stage, Sdf.Path("/DistantLight"))
distantLight.CreateIntensityAttr(300)
Add a Visual Cube
A “visual” cube is a cube with no physics properties attached. No mass, no collision. This cube will not fall under gravity or collide with other objects. You can press Play to see that the cube does not do anything when the simulation is running.
The lines inside getting_started.py that add a visual cube to the scene are:
import numpy as np
from isaacsim.core.api.objects import VisualCuboid
VisualCuboid(
   prim_path="/visual_cube",
   name="visual_cube",
   position=np.array([0, 0.5, 0.5]),
   size=0.3,
   color=np.array([255, 255, 0]),
)
Add Physics and Collision Properties
Common physics properties are mass and inertia matrix, which are the properties that allow the object to fall under gravity. Collision properties are the properties that allow the object to collide with other objects.
Physics and collision properties can be added separately, so you can have an object that collides with other objects but does not fall under gravity, or falls under gravity but does not collide with other objects. But in many cases, they are added together.
In the standalone Python script, physics properties can be added to the cube by turning it into a RigidPrim object as shown below. This gives the object the ability to fall under gravity.
from isaacsim.core.prims import RigidPrim
RigidPrim("/visual_cube")
The snippet below shows the lines that add collision properties, which gives the object the ability to collide with other objects.
from isaacsim.core.prims import GeometryPrim
prim = GeometryPrim("/visual_cube")
prim.apply_collision_apis()
Move, Rotate, and Scale the Cube
The snippet below shows the lines that moved the objects in the scene using the core API.
import numpy as np
from isaacsim.core.prims.xform_prim import XformPrim
from isaacsim.core.prims.prim import Prim

translate_offset = np.array([[1.5,-0.2,1.0]])
rotate_offset = np.array([[90,-90,180]])
scale = np.array([[1,1.5,0.2]])

cube_in_coreapi = XformPrim(Prim(prim_paths_expr="/test_cube"))
cube_in_coreapi.set_world_poses(translate_offset, rotate_offset)
cube_in_coreapi.set_scales(scale)
Save your work.
You can now proceed to the next tutorial.