Data Generation with MobilityGen#
MobilityGen is a toolset built on NVIDIA Isaac Sim that enables you to easily generate and collect data for mobile robots.

MobilityGen supports:
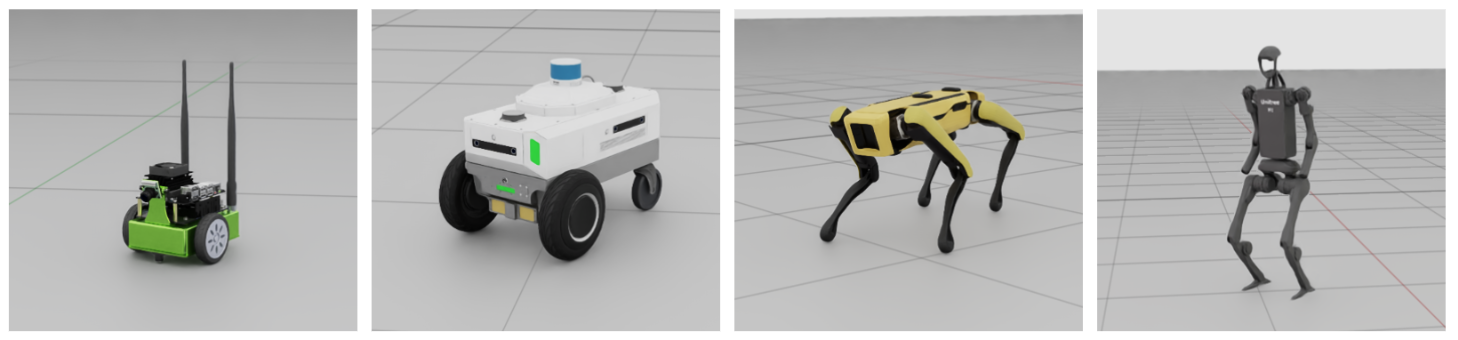
- Many robot types
Differential drive - Jetbot, Carter
Quadruped - Spot
Humanoid - H1
- Many data collection methods
Manual - Keyboard Teleoperation, Gamepad Teleoperation
Automated - Random Accelerations, Random Path Following
Generate Data with MobilityGen#
Step 1 - Build an Occupancy Map#
You must create an occupancy map of your environment.
This tutorial uses an example warehouse scene.
Load the warehouse stage:
Open Content Browser if it’s not already open (Window > Browsers > Content).
Load the warehouse USD file in Isaac Sim/Environments/Simple_Warehouse/warehouse_multiple_shelves.usd.
Create the occupancy map”
Select Tools > Robotics > Occupancy Map to open the Occupancy Map extension.
In the Occupancy Map window set Origin to:
X:2.0Y:0.0Z:0.0Note: To input a value in the text box,
ctrl + left clickto activate the input mode.
In the Occupancy Map window set Upper Bound to:
X:10.0Y:20.0Z:2.0(Assumes the robot can move under 2 meter overpasses)
In the Occupancy Map window set Lower Bound to:
X:-14.0Y:-18.0Z:0.1(Assume the robot can move over 5cm bumps)
Click
Calculateto generate the occupancy map.Click Visualize Image to view the occupancy map.
In the Visualization window under Rotate Image select 180.
In the Visualization window under Coordinate Type select ROS Occupancy Map Parameters File YAML.
Click Regenerate Image.
Copy the YAML text generated to your clipboard.
In a text editor of choice, create a new file named
~/MobilityGenData/maps/warehouse_multiple_shelves/map.yaml.Please note: On windows replace ~ with a directory of choice.
Paste the YAML text copied from the Visualization window into the created file.
Edit the line
image: warehouse_multiple_shelves.pngto readimage: map.png.Save the file.
Back in the Visualization window click Save Image.
In the tree explorer open the folder
~/MobilityGenData/maps/warehouse_multiple_shelves.Under the file name enter
map.png.Click save.
That’s it! Verify that you now have a folder named ~/MobilityGenData/maps/warehouse_multiple_shelves/ with
a file named map.yaml and map.png inside.
Step 2 - Record a Trajectory#
After creating a map of the environment, you can generate data with MobilityGen:
Enable the MobilityGen UI extension.
Navigate to Window > Extensions and search for MobilityGen UI.
Click the toggle switch for the MobilityGen UI extension.
Note: You should see two windows appear. One window is the MobilityGen UI, the other is to display the Occupancy Map and visualizations. One window might be hiding behind the other when they first appear, so we recommend dragging them into a window pane to view both at the same time.
Build the scenario:
In the MobilityGen window under Stage paste the following USD:
In the MobilityGen window under Occupancy Map enter the path to the
map.yamlfile created previously.~/MobilityGenData/maps/warehouse_multiple_shelves/map.yaml
Under the Robot dropdown select H1Robot.
Under the Scenario dropdown select KeyboardTeleoperationScenario.
Click Build.
After a few seconds, verify that you see the scene and occupancy map appear.
Test drive the robot using the following keys:
W- Move forwardA- Turn leftS- Move backwardsD- Turn right
Start recording:
Click Start recording to start recording a log.
Move the robot around.
Click Stop recording to stop recording.
The data is now recorded to ~/MobilityGenData/recordings by default.
Step 3 - Replay and Render#
After recording a trajectory, which includes data, like robot poses, you can now replay the scenario.
To do this, use the replay_directory.py Python script that ships with Isaac Sim.
To run the script call the following from inside the Isaac Sim directory:
./python.sh standalone_examples/replicator/mobility_gen/replay_directory.py --render_interval 40 --enable isaacsim.replicator.mobility_gen.examples
After the script finishes, verify that you have a folder ~/MobilityGenData/replays, which contains
the rendered sensor data.
You can open this folder to explore the data. Note, some data (like segmentation masks) may be difficult to visualize using the file browser alone.
Fortunately, there are many examples on how to load and work with the recorded data in the open source MobilityGen GitHub Repository. We recommend visualizing your recorded data by running the Gradio Visualization Script.
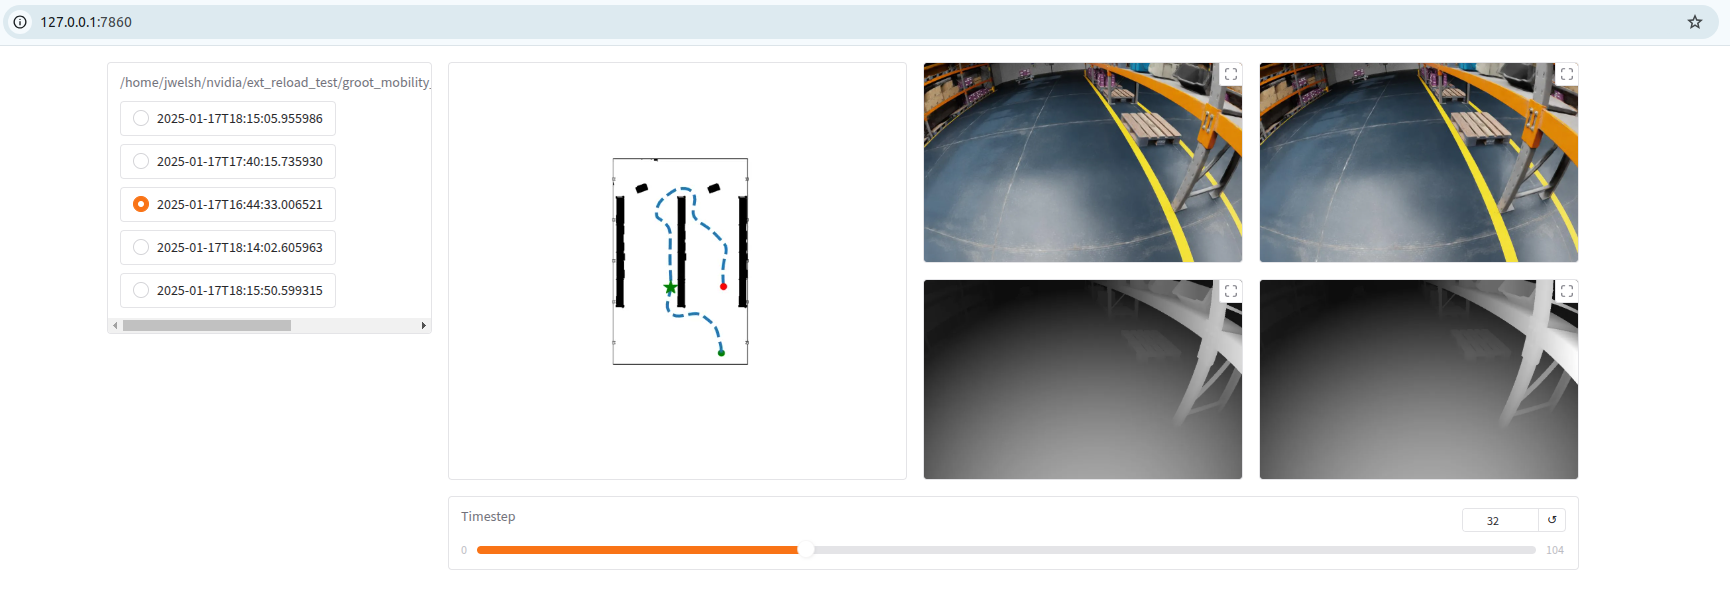
You may also check the reader.py file for a helper class for easily reading the data in Python.
Tips#
Tip 1 - How to generate procedural data#
Generating procedural mobility data with MobilityGen is done very similar to the basic teleoperation workflow above.
To generate procedural data
Follow
Step 1 - Build an occupancy mapabove to create an occupancy map of the environmentFollow
Step 2 - Record a trajectoryabove, but selectRandomPathFollowingScenarioinstead ofKeyboardTeleoperationScenario- You no longer need to manually teleoperate the robot. When the scenario is built, it will run and reset automatically. - You do need to hit “start recording” to enable recording to disk. However, when the scenario resets, a new recording will be created automatically. - You should see recordings collected in the~/MobilityGenDatafolder the same as above.Follow
Step 3 - Replay and renderabove to render the sensor data from the recorded trajectories.
That’s it! The process for other procedural scenarios (like RandomAccelerationScenario) is similar.
Tip 2 - How to add a custom robot#
You can implement a new robot for use with MobilityGen. This involves editing the robots.py file in the MobilityGen Examples extension.
The general workflow is as follows:
Open the
robots.pyfile in an editor of choice. This is located at<isaac sim path>/exts/isaacsim.replicator.mobility_gen.examples/isaacsim/replicator/mobility_gen/examples/robots.pyCreate a new class that subclasses the
MobilityGenRobotclass. Alternatively, if your robot fits one of the existing implementations (likeWheeledMobilityGenRobot), you may subclass that.We recommend starting by reviewing an existing robot implementation in
robots.pyas the easiest way to get started. A good way to start is simply by tweaking an existing robot.
If you’re starting from scratch, implement the required abstract methods of
MobilityGenRobotclassImplement the
build()method. This method is responsible for adding the robot to the USD stage.Implement the
write_action()method. This method takes as input a linear and angular velocity command and performs any control logic.Overwrite common class parameters (like physics_dt).
Register the robot class by using the ROBOT.register() decorator. This makes the custom robot discoverable by MobilityGen.
After implementing this in the file above, save the file.
When you restart Isaac Sim, the new robot should be registered and appear in the MobilityGen UI, and ready for data collection.
Please note, since the registration of a new robot requires editing the Isaac Sim build file, you will want to make a copy of your robot.py externally so you do not lose it.
Next Steps#
That’s it for this tutorial!
In this tutorial, you:
Built an occupancy map for use with MobilityGen.
Recorded a MobilityGen trajectory using the H1 robot with keyboard Teleoperation.
Rendered sensor data based on the recorded trajectory.
As next steps, try recording data:
for a different robot (for example: Spot)
using a different scenario (for example: Random Path Following)