


Camera#
Camera sensors in Isaac Lab are renderer-backed sensors: each Camera instance
is coupled to a renderer that produces the image data. If multiple cameras use the same renderer
type, only one renderer is instantiated and shared between them. The renderer and camera are intentionally
isolated from each other — the camera defines what to capture (pose, resolution, field of view,
data types), while the renderer defines how to render it (RTX ray-tracing, Newton Warp rasterizer,
etc.). This separation allows the same camera configuration to run across different physics and
rendering backends without code changes.
For an overview of the available renderer backends and how to choose between them, see Renderers.
Rendered images are unique among supported sensor data types due to their large bandwidth requirements. A single 800 × 600 image with 32-bit color clocks in at just under 2 MB. At 60 fps across thousands of parallel environments, this grows quickly. Isaac Lab’s tiled rendering API specifically addresses these scaling challenges by batching all cameras into a single render pass.
Renderer Backends#
The renderer used by a camera is configured via the renderer_cfg field on
CameraCfg. The default is IsaacRtxRendererCfg
(NVIDIA RTX, requires Isaac Sim).
|
Requires Isaac Sim? |
Supported data types |
|---|---|---|
|
Yes |
rgb, rgba, depth, normals, motion vectors, semantic/instance segmentation, and all other annotators |
|
No (kit-less) |
|
|
No (+ |
|
Note
The Newton Warp renderer currently supports only ``rgb`` and ``depth`` data types.
Annotators such as segmentation, normals, and motion vectors are Isaac RTX-specific features and
require IsaacRtxRendererCfg.
Tiled Rendering#
Note
This feature is available from Isaac Sim version 4.2.0 onwards (for the RTX renderer). The Newton Warp renderer supports tiled rendering in kit-less mode.
Tiled rendering in combination with image processing networks require heavy memory resources, especially at larger resolutions. We recommend running 512 cameras on RTX 4090 GPUs or similar when using the RTX renderer.
The Tiled Rendering API provides a vectorized interface for collecting image data from all environment clones in a single batched render pass. Instead of one render call per camera, all copies of a camera are composited into a single large tiled image, dramatically reducing host-device transfer overhead.
Isaac Lab provides tiled rendering through Camera, configured via
CameraCfg. The renderer_cfg field selects the rendering backend.
CameraCfg with renderer_cfg#
The renderer is specified via renderer_cfg on CameraCfg. The camera and
renderer configurations are fully decoupled: you can swap renderers without changing any other camera
parameters.
Default (RTX, requires Isaac Sim):
from isaaclab.sensors import CameraCfg
import isaaclab.sim as sim_utils
# IsaacRtxRendererCfg is the default, no explicit import needed

tiled_camera: CameraCfg = CameraCfg(
    prim_path="/World/envs/env_.*/Camera",
    offset=CameraCfg.OffsetCfg(pos=(-7.0, 0.0, 3.0), rot=(0.9945, 0.0, 0.1045, 0.0), convention="world"),
    data_types=["rgb"],
    spawn=sim_utils.PinholeCameraCfg(
        focal_length=24.0, focus_distance=400.0, horizontal_aperture=20.955, clipping_range=(0.1, 20.0)
    ),
    width=80,
    height=80,
    # renderer_cfg defaults to IsaacRtxRendererCfg()
)
Newton Warp renderer (kit-less, no Isaac Sim required):
from isaaclab.sensors import CameraCfg
from isaaclab_newton.renderers import NewtonWarpRendererCfg
import isaaclab.sim as sim_utils

tiled_camera: CameraCfg = CameraCfg(
    prim_path="/World/envs/env_.*/Camera",
    offset=CameraCfg.OffsetCfg(pos=(-7.0, 0.0, 3.0), rot=(0.9945, 0.0, 0.1045, 0.0), convention="world"),
    data_types=["rgb", "depth"],  # only rgb and depth supported with Newton renderer
    spawn=sim_utils.PinholeCameraCfg(
        focal_length=24.0, focus_distance=400.0, horizontal_aperture=20.955, clipping_range=(0.1, 20.0)
    ),
    width=80,
    height=80,
    renderer_cfg=NewtonWarpRendererCfg(),
)
Multi-backend preset (switches renderer alongside physics backend):
For environments that need to support both backends, use
MultiBackendRendererCfg together with the
PresetCfg pattern:
from isaaclab.sensors import CameraCfg
from isaaclab_tasks.utils.presets import MultiBackendRendererCfg
import isaaclab.sim as sim_utils

tiled_camera: CameraCfg = CameraCfg(
    prim_path="/World/envs/env_.*/Camera",
    offset=CameraCfg.OffsetCfg(pos=(-7.0, 0.0, 3.0), rot=(0.9945, 0.0, 0.1045, 0.0), convention="world"),
    data_types=["rgb"],
    spawn=sim_utils.PinholeCameraCfg(
        focal_length=24.0, focus_distance=400.0, horizontal_aperture=20.955, clipping_range=(0.1, 20.0)
    ),
    width=80,
    height=80,
    renderer_cfg=MultiBackendRendererCfg(),  # selects RTX or Newton Warp via presets= CLI arg
)
The active preset is selected at launch via the presets= CLI argument:
# Use Newton Warp renderer
python train.py task=Isaac-Cartpole-RGB-Camera-Direct-v0 presets=newton_renderer

# Use OVRTX renderer
python train.py task=Isaac-Cartpole-RGB-Camera-Direct-v0 presets=ovrtx_renderer

# Use default (Isaac RTX)
python train.py task=Isaac-Cartpole-RGB-Camera-Direct-v0
Accessing camera data#
tiled_camera = Camera(cfg.tiled_camera)
data = tiled_camera.data.output["rgb"]  # shape: (num_cameras, H, W, 3), torch.uint8
The returned data has shape (num_cameras, height, width, num_channels), ready to use directly
as an observation in RL training.
When using the RTX renderer, add --enable_cameras when launching:
python scripts/reinforcement_learning/rl_games/train.py \
    --task=Isaac-Cartpole-RGB-Camera-Direct-v0 --headless --enable_cameras
Annotators (RTX only)#
Note
Annotators are a feature of the Isaac RTX renderer (IsaacRtxRendererCfg).
They are not available with the Newton Warp renderer or ovrtx, which
support only rgb and depth.
Camera exposes the following annotator
data types when using the RTX renderer:
"rgb": A 3-channel rendered color image."rgba": A 4-channel rendered color image with alpha channel."distance_to_camera": Distance to the camera optical center per pixel."distance_to_image_plane": Distance along the camera’s Z-axis per pixel."depth": Alias for"distance_to_image_plane"."normals": Local surface normal vectors at each pixel."motion_vectors": Per-pixel motion vectors in image space."semantic_segmentation": Semantic segmentation labels."instance_segmentation_fast": Instance segmentation data."instance_id_segmentation_fast": Instance ID segmentation data.
RGB and RGBA#
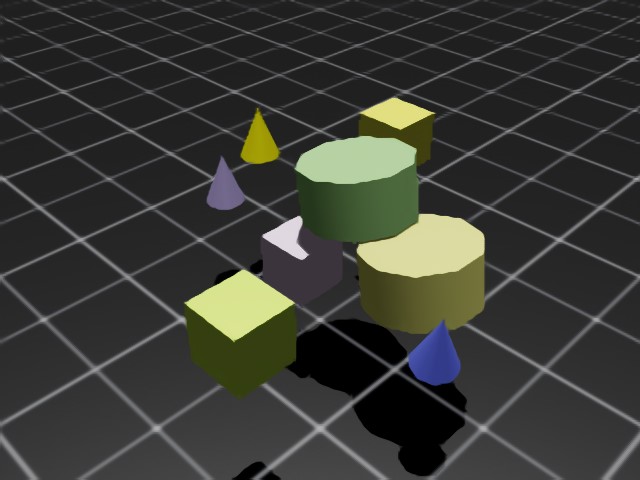
rgb returns a 3-channel RGB image of type torch.uint8, shape (B, H, W, 3).
rgba returns a 4-channel RGBA image of type torch.uint8, shape (B, H, W, 4).
To convert to torch.float32, divide by 255.0.
rgb_hdr returns a 3-channel scene-linear HDR image of type torch.float32, shape (B, H, W, 3).
Post-render Camera ISP#
A camera Image Signal Processing (ISP) pipeline models the chain that maps
the scene-linear radiance captured by a sensor to the LDR pixel values a
downstream consumer sees.
The camera ISP pipeline is usually part of the renderer.
In Isaac Lab we expose a post-render camera ISP pipeline which is applied on top of the renderer’s HDR scene-linear AOV.
This makes it possible to implement additional post-render processing not currently supported by the renderer backends.
The pass is configured via isp_cfg
on every camera and runs once per render tick.
PPISP#
The shipped ISP implementation is PPISP (Physically Plausible Image Signal Processing), an NVIDIA Spatial Intelligence Lab pipeline designed to bring synthetic imagery — most notably 3D Gaussian splat reconstructions — closer to real-camera output without re-training the upstream model. See the project page: https://research.nvidia.com/labs/sil/projects/ppisp .
PPISP is typically authored alongside a ParticleField3DGaussianSplat
USD asset: it carries a RenderProduct
whose target camera and PPISP UsdShade.Shader
(a shader prim named PPISP whose inputs follow the PPISP naming
convention) were calibrated against the real capture rig that produced
the splats. Configuring the camera with the matching PPISP coefficients
makes the rendered tile match the calibration target.
The pipeline applies, in order: responsivity → exposure → vignetting → color homography → camera response function → uint8 clamp. It runs as a single Warp kernel.
Configuration#
isp_cfg accepts three forms:
None(default) — ISP disabled.PpispCfg— explicit PPISP coefficients (inputs), orshader_prim_pathto import them from a PPISPUsdShade.Shaderalready on the stage.CameraISPMode— auto-discover an ISP shader on the stage (see below).
The cfg applies once per Camera sensor batch. The PPISP Warp kernel takes scalar coefficients, so every cloned view in a tiled batch shares the same ISP configuration — there is no per-view ISP today.
from isaaclab.sensors.camera import CameraCfg, CameraISPMode
from isaaclab_ppisp import PpispCfg

# default — ISP disabled
cfg = CameraCfg(...)

# explicit coefficients
cfg = CameraCfg(..., isp_cfg=PpispCfg(inputs={"exposureOffset": 1.5}))

# import coefficients from a USD shader path
cfg = CameraCfg(..., isp_cfg=PpispCfg(shader_prim_path="/World/Render/PPISP"))

# auto-discover from the stage
cfg = CameraCfg(..., isp_cfg=CameraISPMode.AUTO_ANY)
Auto-discovery#
Auto-discovery is opt-in via CameraISPMode. Discovery runs
once at camera construction using the first matched camera prim in the Camera
sensor batch:
Walk the stage for a USD
RenderProductwhosecamerarelationship targets the first matched camera prim and that has a childUsdShade.Shaderprim namedPPISP. If found, import its inputs as aPpispCfg.AUTO_ANYonly: if step 1 finds nothing, fall back to the firstUsdShade.Shaderprim namedPPISPanywhere on the stage.Otherwise the ISP stays disabled for the whole Camera sensor batch.
In practice this means: if the stage carries a ParticleField3DGaussianSplat
together with a RenderProduct that binds a PPISP shader child to the
batch’s first matched camera prim, the Camera sensor picks up the matching ISP
automatically and no Python-side coefficient authoring is required.
AUTO_CAMERA runs step 1 only — useful when the stage carries multiple
PPISP shaders and you want the Camera sensor batch to use exactly the one bound
to its first matched camera prim.
Renderer support#
All three shipped backends advertise the HDR AOV
(RGB_HDR) and compose the ISP pipeline
internally: the Isaac RTX renderer sources HDR from the Replicator
HdrColor annotator, the OVRTX renderer from its HDR render var, the
Newton Warp renderer from its native scene-linear color buffer. Each
backend allocates its own HDR scratch buffer when the user did not request
"rgb_hdr" in data_types, and dispatches the
PPISP kernel into rgb / rgba after every render tick.
Known limitations#
The ISP writes back into the
rgb/rgbabuffers. If neither is requested, configuringisp_cfgraises at camera init.PPISP inputs are static for the lifetime of the camera. Animated USD shader inputs are collapsed to their first authored time sample.
Coefficients are global per camera — no per-pixel or per-region authoring beyond the radial vignetting term.
PPISP is the only ISP implementation today. Other ISP families would need a new config type and discoverer entry.
On the Isaac RTX and OVRTX backends, enabling
isp_cfgforces RTX-side tonemapping off (/rtx/rtpt/gaussian/skipTonemapping/enabled=False) and authors a neutralOmniRtxCameraExposureAPI_1schema on each camera prim so the post-render ISP is the only path that processes color. Mixing this with RTX-side exposure authoring is not supported.Auto-discovery resolves at camera construction; later authoring of a
RenderProductor shader on the stage is not picked up.
Depth and Distances#
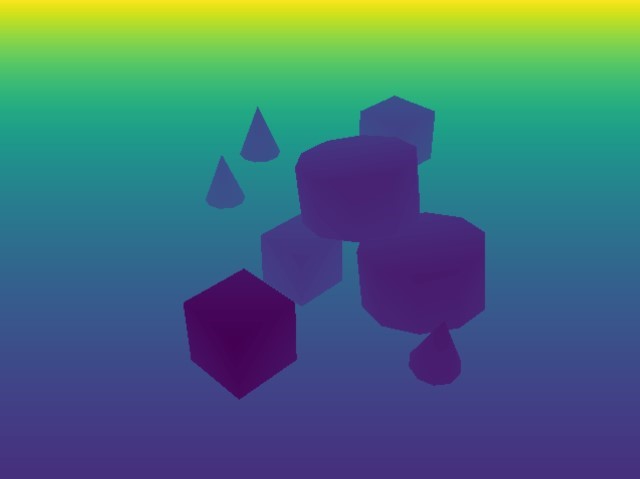
distance_to_camera returns a single-channel depth image with distance to the camera optical
center, shape (B, H, W, 1), type torch.float32.
distance_to_image_plane returns distances of 3D points from the camera plane along the Z-axis,
shape (B, H, W, 1), type torch.float32.
depth is an alias for distance_to_image_plane.
Normals#
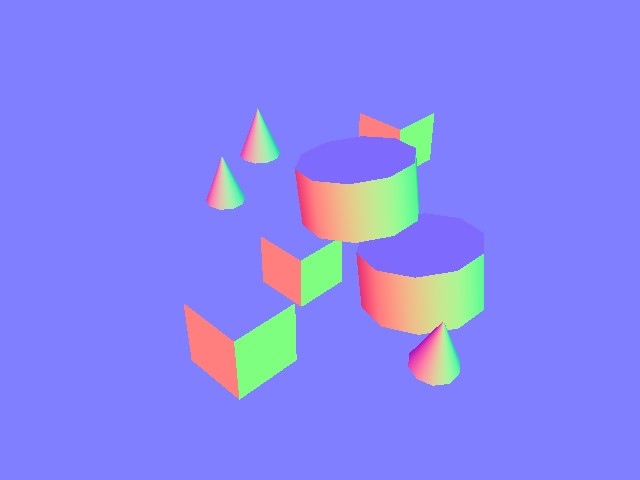
normals returns local surface normal vectors at each pixel, shape (B, H, W, 3) containing
(x, y, z), type torch.float32.
Motion Vectors#
motion_vectors returns per-pixel motion vectors in image space between frames.
Shape (B, H, W, 2): x is horizontal motion (positive = left), y is vertical motion
(positive = up). Type torch.float32.
Semantic Segmentation#
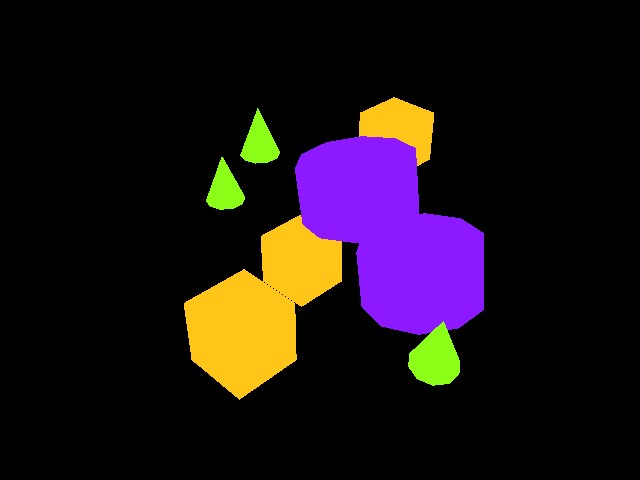
semantic_segmentation outputs per-pixel semantic labels for entities with semantic annotations.
An info dictionary is available via tiled_camera.data.info['semantic_segmentation'].
If
colorize_semantic_segmentation=True: 4-channel RGBA image, shape(B, H, W, 4), typetorch.uint8. TheidToLabelsdict maps color to semantic label.If
colorize_semantic_segmentation=False: shape(B, H, W, 1), typetorch.int32, containing semantic IDs. TheidToLabelsdict maps ID to label.
Instance ID Segmentation#

instance_id_segmentation_fast outputs per-pixel instance IDs, unique per USD prim path.
An info dictionary is available via tiled_camera.data.info['instance_id_segmentation_fast'].
If
colorize_instance_id_segmentation=True: shape(B, H, W, 4), typetorch.uint8. TheidToLabelsdict maps color to USD prim path.If
colorize_instance_id_segmentation=False: shape(B, H, W, 1), typetorch.int32. TheidToLabelsdict maps instance ID to USD prim path.
Instance Segmentation#
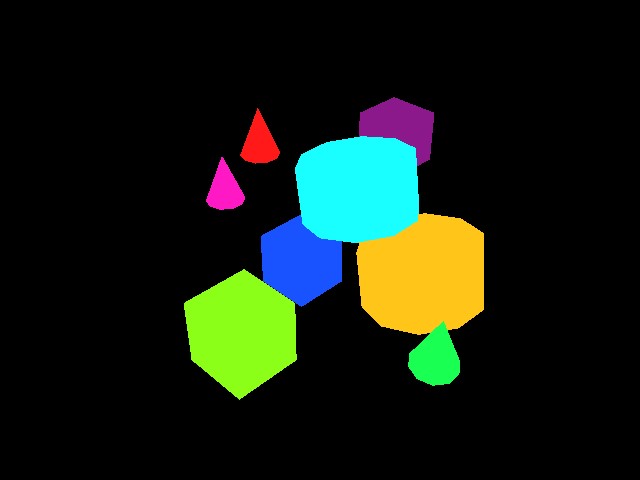
instance_segmentation_fast outputs instance segmentation, traversing down the prim hierarchy
to the lowest level with semantic labels (unlike instance_id_segmentation_fast, which always
goes to the leaf prim).
An info dictionary is available via tiled_camera.data.info['instance_segmentation_fast'].
If
colorize_instance_segmentation=True: shape(B, H, W, 4), typetorch.uint8.If
colorize_instance_segmentation=False: shape(B, H, W, 1), typetorch.int32.
The idToLabels dict maps color to USD prim path. The idToSemantics dict maps color to
semantic label.